Easy Landscape Watercolor Painting Video Lesson
Explore an easy landscape watercolor painting video lesson loaded with simple techniques for all levels. Grab your brushes and let's get started.
Embarking on the journey of watercolor painting can be both exciting and intimidating, especially if you’re just starting out. That’s why we’ve crafted this comprehensive step-by-step guide to help you master the art of creating a captivating landscape painting using watercolors.
In this in-depth tutorial, you’ll discover how to transform a blank piece of paper into a vibrant masterpiece with just five simple yet impactful steps. Along the way, we’ll provide you with a treasure trove of tips and insights tailored to watercolor beginners, ensuring that your artistic adventure is nothing short of magical. So, gather your paints, unleash your creativity, and let’s delve into the world of watercolor wonder.
Unveiling the Step-by-Step Process for Crafting an Effortless Watercolor Landscape
As we embark on this creative expedition, let’s break down the process into manageable steps. Feel free to refer to the accompanying images as visual aids and delve into the instructions whenever you’re seeking more information.
Suggested Material Checklist
Materials can make or break the outcome of a watercolor study. Watch the video that covers the best watercolor materials if you need more specifics about color choices, brush sizes and such. Basically, it’s exactly what I use and recommend for all levels.
Watercolor Paints: Opt for artist-grade watercolor paints in a range of colors. Choose a basic palette that includes six primary colors (one cool and warm hue for each one including red, blue, and yellow) along with earth tones for a versatile collection.
If you aren’t aware of the six primary palette, then check out our in-depth article on how to mix watercolors for beginners. It has the exact hues I use for every painting. And, if I make changes, I always update the article so you know the exact hues that get the best results.
Brushes: Invest in a set of good-quality watercolor brushes with different shapes and sizes. Round brushes are excellent for detailed work, while flat brushes are great for larger washes. I’d recommend one medium and one large pointed round. Then get a large mop brush that will handle those initial washed that are applied in the very beginning.
You only need three brushes to do most of the heavy lifting! However, I do recommend having a dagger and possibly and Motler on hand as well. Check out the article I wrote on how to choose the best watercolor brushes if you have questions on the exact brands, sizes and such.
Paper: I highly recommend selecting watercolor paper specifically designed for this medium. Look for papers labeled “cold-pressed” or “hot-pressed” to suit your preferred texture. Experiment with different weights and brands to find the one that suits your style. Most beginners choose 140 lb. cold press to start their journey. Hot press tends to be a little slick and most used for highly detailed work and portraits.
Avoid cheap, wood pulp papers as they don’t react properly to washes and other techniques. These cheaper papers tend to break down quickly and don’t age well either, basically yellowing over time. Be sure to read the how to choose the best watercolor paper article when you have time.
If you aren’t aware of the six primary palette, then check out our in-depth article on how to mix watercolors for beginners. It has the exact hues I use for every painting. And, if I make changes, I always update the article so you know the exact hues that get the best results.
Palette: A palette is essential for mixing and diluting your watercolors. Choose a palette with wells to hold different colors and a large mixing area. Small palettes tend to get dirty too quick and I found it difficult to have enough free space to mix enough colors without having to stop everything to clean up. The Masterson Pro palette works great and available at Amazon and Blick Art.
Water Containers: Have at least two containers for water—one for rinsing your brushes and another for clean water. Make sure the containers aren’t too small, and I would recommend plastic over glass. I’ve had plenty of studio accidents and cleaning up shattered glass isn’t ideal when in a creative mode.
Masking Tape and Drawing Board: Masking tape helps secure your paper to a drawing board, keeping it flat and preventing it from warping. The tape is optional and depends if you prefer the clean edges. In the beginning you will most likely focus on sketches and studies, so maybe pass until you determine later on if you need it.
A smooth, firm board is a must! I recommend Gator foam board as it’s very sturdy, smooth and durable. Fairly inexpensive and light weight to boot. That covers materials, let’s move on to skills you need to start watercolor painting.
With our arsenal fully equipped, it’s time to embark on our creative voyage. The article below covers my watercolor materials in more detail.
A Primer on Essential Materials
Before we dive into the painting process, let’s take a moment to discuss the foundational materials that underpin the success of our watercolor landscape tutorial. Quality paint and paper are paramount, and while brushes offer opportunities for cost savings, compromising on paper and paint quality can lead to frustration and compromised outcomes.
If you’re curious about the exact materials we recommend, explore our top 10 watercolor supplies list, discover exceptional yet budget-friendly paint brushes, and gain insights into selecting high-quality paper.
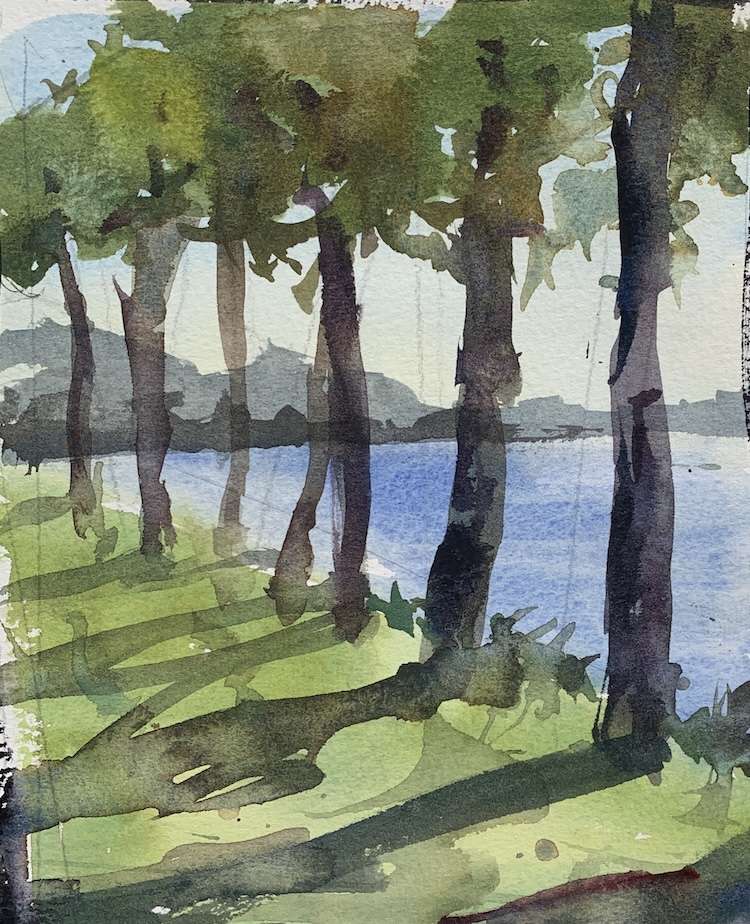
Setting the Stage: Initiating Your Beginner Watercolor Landscape
Before our paper bursts to life with color, it’s essential to establish a solid foundation. Here’s a step-by-step breakdown of the process:
1. Crafting Your Initial Design
Begin by sketching your envisioned landscape on the paper using a #2 pencil. Don’t get bogged down by intricate details; instead, focus on outlining the ground plane and a basic contour for the trees. Keep in mind that your pencil lines should be light in value to prevent them from showing through the finished painting.
If you’re seeking a template for this painting, scroll down to find a downloadable option that allows you to effortlessly transfer the design to your canvas.
2. Bringing Skies to Life: The Variegated Wash Technique
Creating a captivating sky is an art in itself. Here’s how to do it justice:
Mix Your Colors: Prepare a tea mixture of cerulean blue, ensuring that the colors are more water-heavy than pigment-concentrated. Aim for muted, soft shades. Here’s a useful article for how to mix watercolors like a pro. Check it out!
Applying the Wash: Begin at the top of the sky, gradually working your way down halfway. Transition to alizarin crimson, another tea mixture. Exercise caution, as this hue is intensely vibrant. Apply it to the lower portion of the paper. To ensure a gradual transition, add an extra stroke of blue if the upper sky appears flat.
Patiently Allow Drying: Give your sky ample time to dry completely.
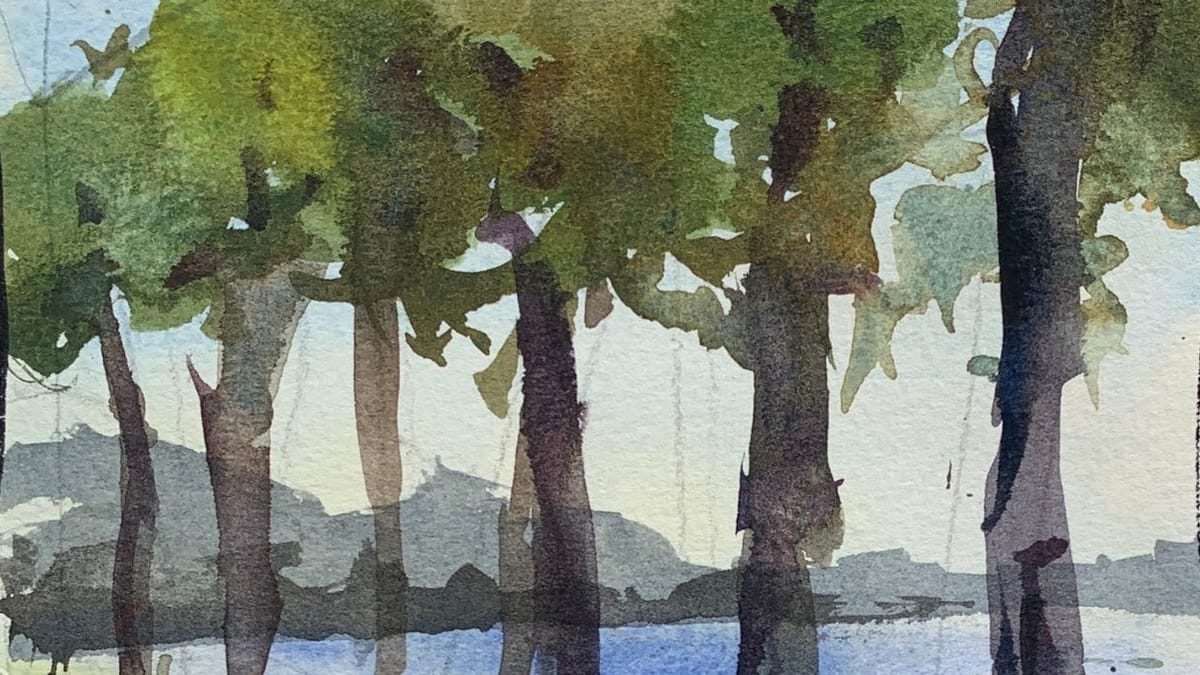
3. Breathing Life into Trees: Adding Foliage and Trunks
The trees are the soul of your landscape. Here’s how to make them shine:
Mixing the Right Shades: Combine cerulean blue, cadmium yellow lemon, and a hint of burnt sienna, ultramarine blue, and neutral tint. These latter three hues will subtly tone down the green.
Painting Foliage: Utilize the brush’s tip and side to craft diverse brushstrokes, lending a dynamic quality to your foliage. To prevent a monotonous green wash, introduce some burnt sienna via a charging technique. Additionally, use a damp, clean brush to lift off sections of paint for added texture.
Hey! Looking for more awesome watercolor painting ideas?
4. Grounding Your Vision: Crafting the Ground Plane
A vibrant ground plane provides a solid foundation for your composition. Here’s how to achieve just that:
Select Your Colors: Opt for yellow ochre and evenly apply it across the ground area. For added depth, introduce neutral tint to the shadowed regions.
Achieving Balance: If the wash appears flat, consider adding more yellow ochre or a touch of burnt sienna to infuse variety.
5. Deepening Shadows: Infusing Depth and Character
The final touches bring your landscape to life. Here’s how to add those captivating details:
Delineating Tree Trunks: Once everything is completely dry, introduce tree trunks using neutral tint, burnt sienna, and any residual green from your palette. The green will temper the intensity of the dark brown, preventing overwhelming visual weight.
Enhancing Shadows: Elevate the dimensionality of your tree shadows by layering darker tones. Add a pop of red to invigorate the aesthetics.
Mastering Cast Shadows: While the cast shadows beneath the trees are still wet, merge in a green wash, allowing it to cascade towards the lower edge of the paper.
Congratulations, Maestro! You’ve Created Art!
With these five transformative steps, you’ve brought an empty canvas to life, unveiling a mesmerizing watercolor landscape that speaks to your creativity and dedication. As you gaze upon your completed masterpiece, remember that every stroke, wash, and detail is a testament to your journey as an artist.
We’re eager to hear about your artistic escapade—did you craft a breathtaking landscape? Share your thoughts in the comments below and let your creative journey inspire others on their path to watercolor enchantment.
