Three Watercolor Cloud Painting Techniques
Discover three step-by-step techniques for beginners to create skies and dramatic storm clouds, infusing nature sketches with atmosphere.
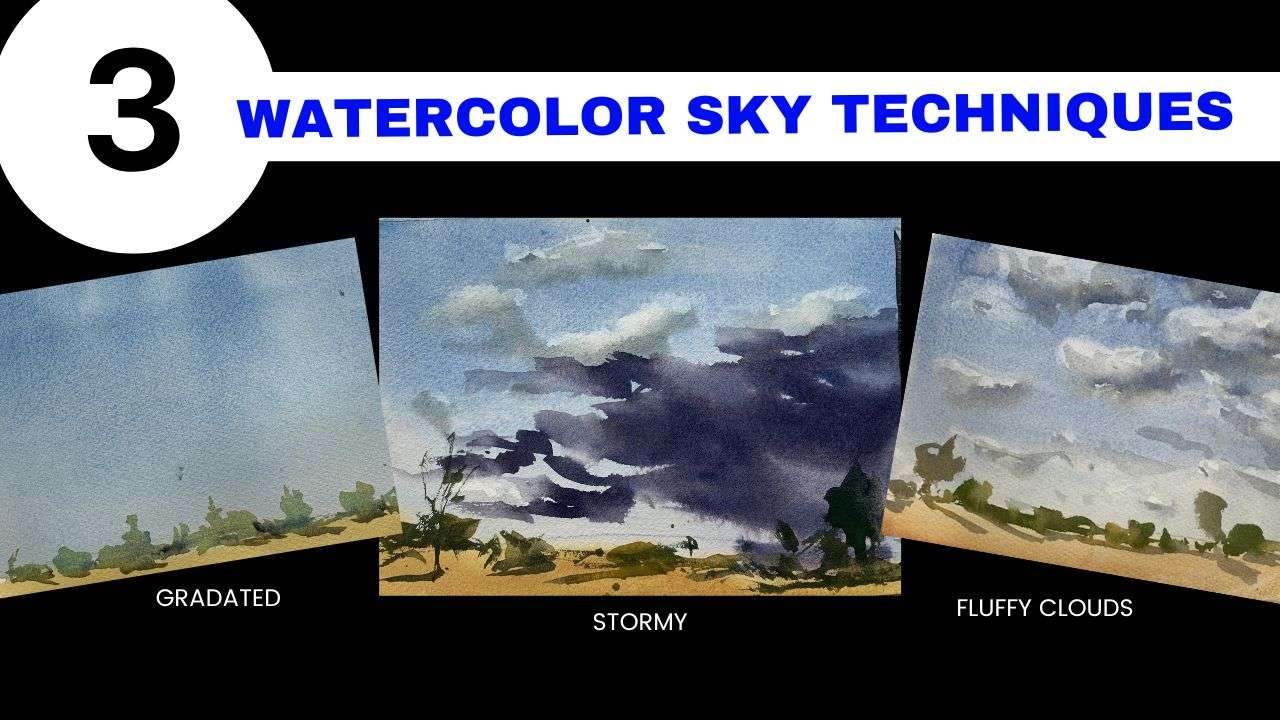
In the vast canvas of watercolor art, learning how to paint clouds in watercolor is a fundamental skill that transforms a nature sketching project from simple to atmospheric. The sky, after all, is not just a backdrop but a dynamic element that can dictate the mood of your watercolor landscapes or cityscapes, offering both light and depth.
Whether you’re envisioning the sky as the star of your painting or a subtle complement to your main idea, mastering various cloud painting techniques such as wet-into-wet, dry brush, and glazing is key to bringing your artistic vision to life.
This article dives into three easy-to-follow watercolor cloud painting techniques, starting with a simple gradated sky before advancing to more complex skies featuring cumulous clouds and an impending storm.
Designed for beginners eager to enhance their watercolor landscapes, these un-cut, step-by-step tutorials will not only hone your skills but also invigorate your nature sketching endeavors with the delicate artistry of cloudscapes.
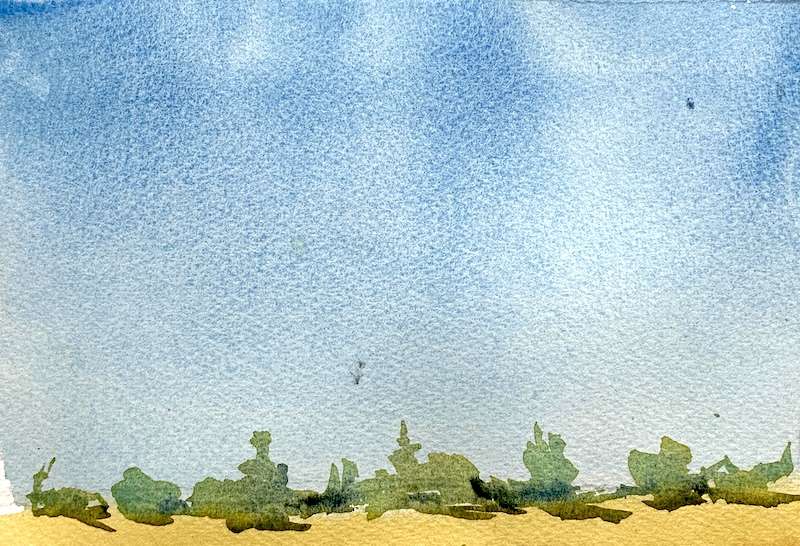
Simple Gradated Sky
Embarking on the journey of mastering how to paint clouds in watercolor begins with the enchanting technique of creating a simple gradated sky. This foundational skill sets the stage for more intricate cloud formations and imbues your nature sketching with a sense of depth and atmosphere.
- Preparation and Base Layer:
- Start by securing the borders of your watercolor paper with tape for crisp, clean edges.
- With a Princeton Select Mop Brush, evenly wet the entire surface to prepare for a wet-on-wet application, ensuring a smooth gradient without harsh lines.
- Employ a round brush (number 12) dipped in a vibrant blue, initiating at the top with a strong hue and gradually diluting with water as you descend to mimic the sky’s natural lightening towards the horizon.
- Defining the Sky and Clouds:
- Utilize sideways brushstrokes to lay down the blue of the sky, carefully navigating around areas reserved for clouds.
- To create the illusion of fluffy, billowy clouds, employ a light upward swirling motion with a damp brush, allowing the white of the paper to shine through.
- Warm up the sky by subtly incorporating Cerulean into your blue mix, enhancing the sky’s vibrancy and depth.
- Finishing Touches:
- As the sky dries, consider the option of layering additional washes for intensity or introducing a starry effect with specks of white acrylic paint.
- Once satisfied, gently remove the tape to unveil a professionally framed piece ready to captivate any viewer.
By adhering to these steps, artists can create a serene backdrop, setting the tone for further exploration into the dynamic world of watercolor clouds.
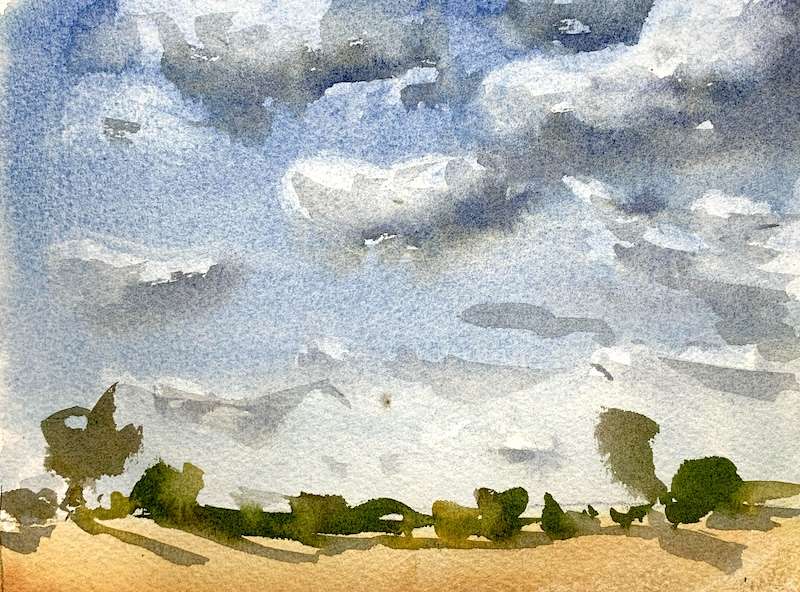
Cumulous Cloud Sky. Fluffy Clouds
As we venture further into our journey on how to paint clouds in watercolor, let’s embrace the fluffy charm of cumulus clouds. These clouds, reminiscent of cotton balls scattered across the sky, add a playful yet serene element to nature sketching. Here’s how you can bring them to life:
- Initial Wash: Begin with a wash of clean water over the entire sky area, setting the stage for a dynamic background. Mix a gentle grey using Ultramarine Blue, Burnt Sienna, and a hint of Sap Green, applying it evenly across the wet surface. This base color sets a moody atmosphere, perfect for fluffy clouds.
- Creating Clouds:
- Use a large quill brush (size 6) to apply the base color.
- For the clouds, switch to a damp tissue technique. Lightly dab the tissue onto the sky, lifting the paint and revealing the white of the paper beneath. This method creates the soft, fluffy texture characteristic of cumulus clouds.
- Enhance the clouds’ volume by adding shadows at the bottom. A mix of more concentrated Ultramarine and Burnt Sienna deepens the shadow, adding dimension.
- Remember, the key to fluffy clouds is the contrast between the soft white of the paper and the gentle shadows beneath each cloud.
- Finishing Touches:
- Introduce variety by adjusting the intensity of the shadows under different clouds, creating a more dynamic sky.
- Near the horizon, paint clouds smaller and closer together, gradually increasing their size and spacing as you move upwards. This perspective trick adds depth to your watercolor landscape.
- Soften the edges of some clouds with a barely wet brush for a more natural look, and use a clean, dry brush to add subtle highlights, enhancing the fluffiness.
These steps, combined with a playful approach to shape and color, will elevate your cloud-painting skills, making your nature sketching projects truly sky-high!
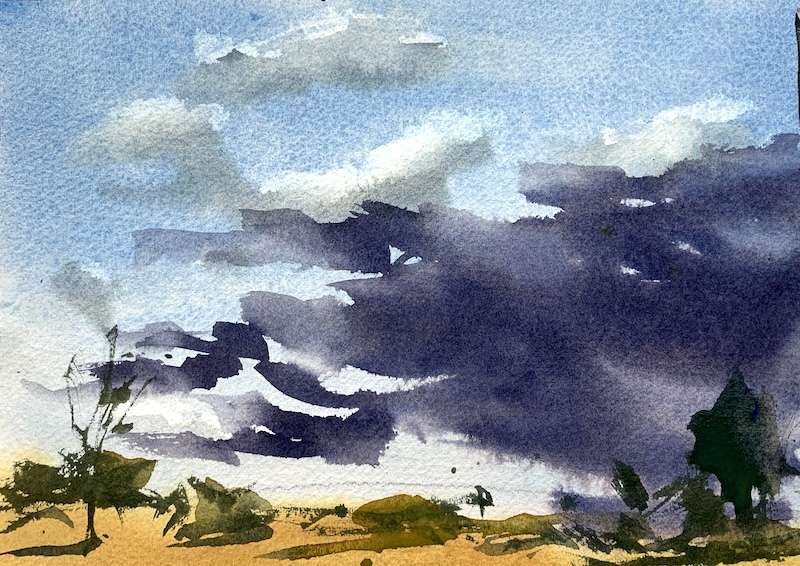
Approaching Storm Technique
Capturing the drama of an approaching storm in watercolor can be an exhilarating challenge, offering a chance to play with contrast, color, and emotion. Here’s how to create a stormy sky that promises to be both a spectacle and a lesson in the dynamic use of watercolors:
- Setting the Scene:
- Begin by wetting both sides of your paper evenly to prepare for a dramatic, fluid background.
- Sketch out a low horizon line, taking up about one-fifth of the page, allowing the tumultuous sky to dominate the scene.
- Building the Storm:
- Apply a base layer using a mix of Payne’s gray and indigo, creating the brooding backdrop of the stormy sky.
- With a one-inch brush, layer phthalo blue and Payne’s gray, leaving some areas lighter to represent the areas where sunlight might break through the storm clouds.
- For the clouds, use tissue paper to lift paint off the paper, creating the textured edges characteristic of storm clouds. Add depth by applying stronger Payne’s gray and burnt umber in certain areas once the initial layer has dried.
- Final Touches:
- Highlight the contrast between the dark sky and the landscape below by painting the land in bright, light colors like lemon yellow for a sunlit effect.
- Create a focal point by leaving an ovular shape lighter at the top of the painting, where you can later add a lightning bolt using opaque white or light acrylic paint for a striking effect.
- Review and adjust the painting once dry, adding details like silhouettes of trees or buildings at the horizon line to ground the composition and enhance the sense of an impending storm.
Through these steps, artists can convey the powerful beauty of nature’s fury, adding a dynamic and emotional layer to their watercolor landscapes.
Practical Applications and Tips
Diving into the world of watercolor clouds, artists find themselves at the crossroads of creativity and technique. Here are practical applications and tips to elevate your cloudscapes:
- Experiment with Values and Techniques:
- Practice with different colors to understand values.
- Use Hot Press paper for smoother clouds like stratus.
- Allow layers to dry for soft edges, preventing color bleed.
- Mask your paper into squares to test color combinations, washes, and blotting techniques.
- Design and Composition:
- The sky isn’t just a backdrop; integrate it as part of your painting’s design.
- Use cloud shapes, light, and rain patches to guide the viewer’s eye towards the focal point.
- Small details, like adding Ultramarine Gouache to shadows, breathe life into your painting.
- Remember, skies don’t always have to be dramatic; sometimes subtlety speaks volumes.
- Technique Specifics:
- For cumulus clouds, use a damp tissue to lift paint, creating fluffy textures.
- Employ a large mop brush for broad shapes, switching to medium-round brushes for finer details.
- The wet-on-wet technique is crucial for achieving soft, diffuse edges.
- Preserve the white of your paper; it’s your cloud’s best friend.
By melding these insights with your unique style, you’ll not only capture the essence of clouds but also infuse your landscapes with a soul-stirring depth that resonates with viewers.
Conclusion
Through the exploration of three distinct watercolor cloud painting techniques, this article provides a comprehensive guide to capturing the ethereal beauty of clouds, from the soft gradients of a simple sky to the dramatic energy of an impending storm. By embarking on this journey with easy-to-follow, un-cut, step-by-step tutorials designed specifically for beginners, artists are equipped to elevate their landscapes, turning the sky from a mere backdrop to a compelling protagonist of their watercolor narratives. This progression from basic to more complex skills not only enriches the artist’s toolkit but also instills a deeper appreciation for the dynamic nature of the sky.
The practical applications and tips shared offer insights into perfecting this art, underscoring the importance of technique, composition, and experimentation. As artists incorporate these methods into their work, they will not only achieve more lifelike and captivating cloudscapes but also discover a newfound depth in their overall landscapes. Encouraged to meld these techniques with their unique style, artists stand to transform their nature sketching endeavors, ensuring that each piece not only captures the viewer’s eye but also the fleeting, boundless beauty of the sky.
FAQs
What are the steps involved in painting clouds with watercolor?
To paint clouds effectively, follow these steps:
- Soak your watercolor paper on both sides.
- Apply a gradient as the background.
- Begin forming the cloud shapes.
- Add shadows to give the clouds depth.
- Paint smaller, detailed shapes within the clouds.
- Use a soft brushing technique for a realistic texture.
- Create a context within the composition to integrate the clouds.
- Paint soft shadows on other elements like mountainsides for consistency.
How can I create realistic clouds using watercolors?
To create clouds with watercolors, proceed as follows:
- Start by painting from light to dark, using a warm grey for the lightest parts of the clouds.
- Gradually add more colors to your mix to create a darker grey, layering it onto the brighter cloud areas.
- Incorporate Neutral Tint and Lavender to add depth and shadow to the underside of the clouds.
What is an effective method for painting skies with watercolor?
When painting skies in watercolor, consider these tips:
- Vary your brush strokes to add texture and movement.
- Use a more diluted mix as you approach the horizon for a sense of depth.
- Paint thinner, closer cloud lines near the horizon.
- Instead of copying a reference photo exactly, use it as inspiration to create a natural sky.
How many watercolor painting techniques are commonly used?
There are several essential watercolor techniques that artists use, including:
- Wet-on-wet
- Wet-on-dry
- Dry brush technique
Additionally, mastering different washes such as flat, graded, and variegated is crucial for any watercolorist.
