Discover the Perfect Watercolor Workspace Setup
Discover the perfect watercolor workspace setup. This sets the stage for a captivating performance. Great for getting organized before you paint.

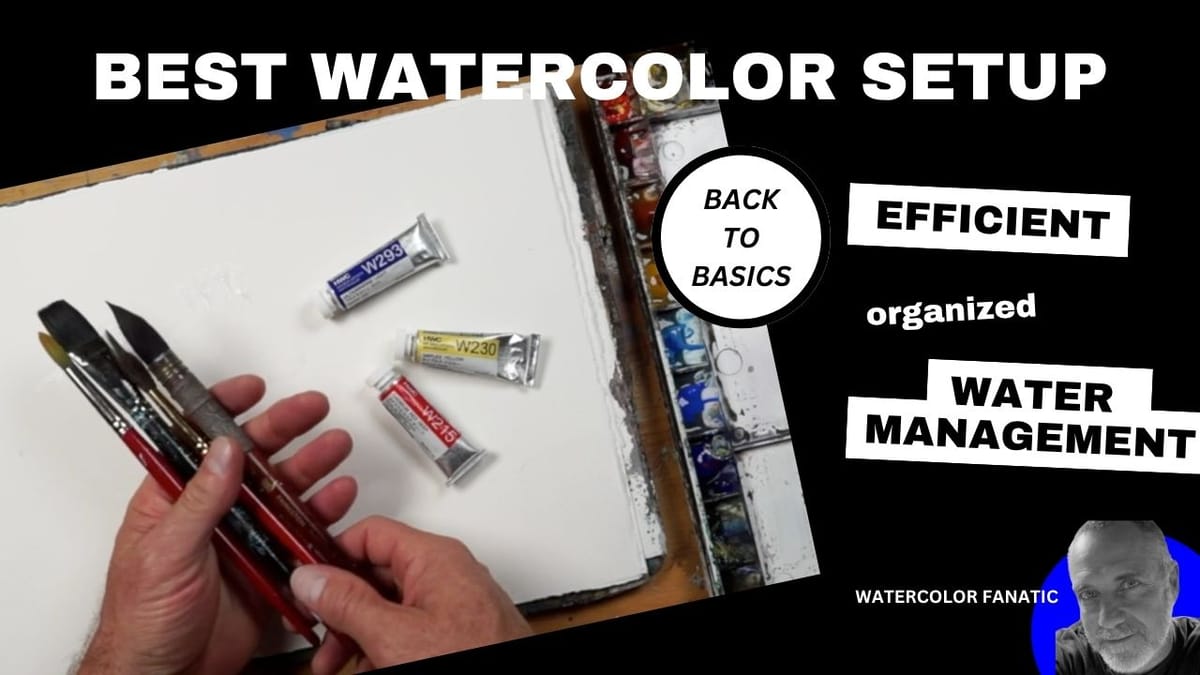
I’ve made so many mistakes that could have been easily avoided if I had the proper watercolor workspace. The setup I share with you today isn’t just placing your palette here, or putting brushes in a jar! No, it’s more about having a system that eliminates many common issues like drowning hurt in the wells, avoiding flooding the mixing area and understanding what’s needed to manage water.
And yes, we will cover where certain materials are places as well. But the key here is to have a consistent workspace that’s productive. So, let’s dive in and discover how to set up the perfect watercolor wonderland.
Workspace setup video
Joining Fanatic Plus helps support the site and gives you full access to every premium course and in-depth tutorial.
👉 Join Fanatic Plus
Here’s the Perfect Watercolor Workspace Guide
The video covers this in detail, but here’s a breakdown of what works well. The overall idea is to have a clean and clutter-free environment that boosts your productivity and eliminates common issues.
Here are some tips to keep your workspace tidy and productive;
- Keep brushes and water reservoirs on the side on dominant hand you paint with which will eliminate reaching over artwork,
- Keep water reservoirs on a towel, or napkins to eliminate puddling.
- Have a hand towel, or several rolled up paper towels at the base of water reservoirs to help absorb excess water when rinsing, or cleaning brushes.
- Always ‘tap, tap’ brushes on towel before reaching into paint wells.
- Have your artwork on a firm board and slightly tilted down ward to reduce puddling.
- Double check that you have all your supplies ready to go, including full wells, no need to go scrambling for paint in the middle of a painting.
- Brushes: Keep your brushes within arm’s reach by storing them in a brush holder or a jar. Sort them by size and shape, making it easier to select the right one for your desired stroke. Remember to clean your brushes thoroughly after each use to maintain their longevity.
- Paints: Organize your watercolor paints by color family or in a rainbow order. This arrangement not only looks visually appealing but also helps you find the desired shade quickly. Consider using a palette with separate wells for each color, preventing color contamination.
- Palette: Speaking of palettes, opt for a spacious and durable one. A porcelain or ceramic palette is ideal as it allows the paint to stay wet for longer periods. Additionally, ensure your palette has enough mixing areas to blend colors effortlessly.
- Paper: Store your watercolor paper in a flat and dry location. Invest in a portfolio or a large envelope to protect your precious paintings from dust and moisture. Keep different paper sizes neatly stacked, making it easy to select the right one for your artwork.
Choosing the Right Location for Your Watercolor Setup
Now I didn’t cover this in the video, so I apologize for overlooking lighting. However, if you can follow the tips below I’m sure you’ll find the best place to setup shop. The right environment can make a significant difference in your painting experience and the final outcome of your artwork. Consider the following factors when choosing your painting spot.
- Lighting: Natural light is a watercolorist’s best friend. Set up your workspace near a window or in a well-lit room, allowing the colors to appear true and vibrant. If natural light is limited, invest in a good-quality daylight lamp to mimic the sun’s illumination.
- Ventilation: Adequate ventilation is essential when working with watercolor paints, as some pigments emit fumes. Ensure your chosen location has proper air circulation to prevent any potential health issues. A well-ventilated room also helps in drying your artwork faster.
- Comfort: Comfort is key when spending hours immersed in your creative process. Choose a location with a comfortable chair and a sturdy table at an appropriate height. Consider using an easel to adjust the painting angle, reducing strain on your neck and back.
- Inspiration: Surround yourself with inspiration in your chosen location. Hang artwork, display nature photographs, or keep a mood board of your favorite watercolor pieces. A visually appealing environment can ignite your creativity and fuel your artistic flow.
Suggested Material Checklist
Materials can make or break the outcome of a watercolor study. Watch the video that covers the best watercolor materials if you need more specifics about color choices, brush sizes and such. Basically, it’s exactly what I use and recommend for all levels.
Watercolor Paints: Opt for artist-grade watercolor paints in a range of colors. Choose a basic palette that includes six primary colors (one cool and warm hue for each one including red, blue, and yellow) along with earth tones for a versatile collection.
If you aren’t aware of the six primary palette, then check out our in-depth article on how to mix watercolors for beginners. It has the exact hues I use for every painting. And, if I make changes, I always update the article so you know the exact hues that get the best results.
Brushes: Invest in a set of good-quality watercolor brushes with different shapes and sizes. Round brushes are excellent for detailed work, while flat brushes are great for larger washes. I’d recommend one medium and one large pointed round. Then get a large mop brush that will handle those initial washed that are applied in the very beginning.
You only need three brushes to do most of the heavy lifting! However, I do recommend having a dagger and possibly and Motler on hand as well. Check out the article I wrote on how to choose the best watercolor brushes if you have questions on the exact brands, sizes and such.
Paper: I highly recommend selecting watercolor paper specifically designed for this medium. Look for papers labeled “cold-pressed” or “hot-pressed” to suit your preferred texture. Experiment with different weights and brands to find the one that suits your style. Most beginners choose 140 lb. cold press to start their journey. Hot press tends to be a little slick and most used for highly detailed work and portraits.
Avoid cheap, wood pulp papers as they don’t react properly to washes and other techniques. These cheaper papers tend to break down quickly and don’t age well either, basically yellowing over time. Be sure to read the how to choose the best watercolor paper article when you have time.
If you aren’t aware of the six primary palette, then check out our in-depth article on how to mix watercolors for beginners. It has the exact hues I use for every painting. And, if I make changes, I always update the article so you know the exact hues that get the best results.
Palette: A palette is essential for mixing and diluting your watercolors. Choose a palette with wells to hold different colors and a large mixing area. Small palettes tend to get dirty too quick and I found it difficult to have enough free space to mix enough colors without having to stop everything to clean up. The Masterson Pro palette works great and available at Amazon and Blick Art.
Water Containers: Have at least two containers for water—one for rinsing your brushes and another for clean water. Make sure the containers aren’t too small, and I would recommend plastic over glass. I’ve had plenty of studio accidents and cleaning up shattered glass isn’t ideal when in a creative mode.
Masking Tape and Drawing Board: Masking tape helps secure your paper to a drawing board, keeping it flat and preventing it from warping. The tape is optional and depends if you prefer the clean edges. In the beginning you will most likely focus on sketches and studies, so maybe pass until you determine later on if you need it.
A smooth, firm board is a must! I recommend Gator foam board as it’s very sturdy, smooth and durable. Fairly inexpensive and light weight to boot. That covers materials, let’s move on to skills you need to start watercolor painting.
Conclusion
Congratulations! You have successfully set up the perfect watercolor wonderland for your creative adventures. By organizing your supplies, choosing the right location, and maintaining a clean and clutter-free workspace, you have created an environment that fosters creativity and artistic expression.
Now, dive into the world of watercolors with confidence, knowing that your setup is optimized for your artistic endeavors. So, grab your brushes, put on your painting smock, and let your imagination run wild in your watercolor wonderland!


