Discover the Best Watercolor Setup for All Levels
Discover the best watercolor setup for all levels with the right tools, paints, and workspace flow. Unleash the skills and let your artwork soar!
In this blog post, we will explore the best practices for setting up your watercolor workspace, arranging colors on your palette, managing water effectively, and mixing paints without flooding your palette. Plus, we have an accompanying video tutorial to visually guide you through the process.
Beginner watercolor video
Let’s Dive in to the Best Watercolor Setup
Watercolor painting is a captivating and versatile medium that allows artists to create stunning artworks with the subtle beauty of transparent pigments and flowing washes. To make the most of your watercolor experience, it’s essential to have a well-organized and efficient setup.
Part 1: Setting Up Your Watercolor Workspace
Before you start painting with watercolors, it’s crucial to create a comfortable and organized workspace that promotes creativity and ease of use. Here are some key steps to consider:
- Selecting Your Workspace: Choose a well-lit and quiet area where you can work comfortably. Natural light is ideal, but good quality artificial lighting can also work well.
- Easel or Flat Surface: Decide whether you prefer to work on an easel or a flat table surface. Easels are excellent for larger works, while a flat surface allows for better control over smaller pieces.
- Organize Your Supplies: Arrange your brushes, palettes, paints, and water containers within easy reach. Having everything at arm’s length will save you time and effort.
- Protect Your Work Area: Lay down a drop cloth or plastic sheet to catch any drips or spills. This will help keep your workspace clean and prevent damage to your surroundings.
Part 2: Arranging Colors on Your Palette
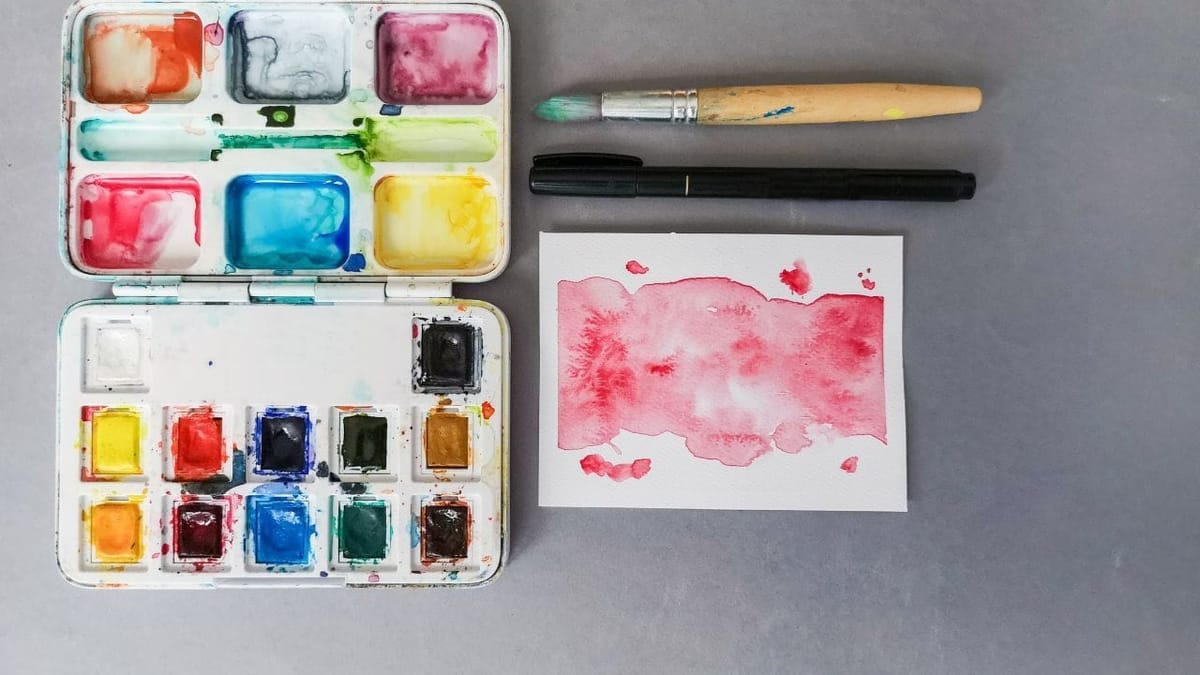
Your palette is the heart of your watercolor setup, and how you arrange your colors can impact your painting process. Here’s how to set up your palette effectively:
Select a Suitable Palette: Choose a palette with wells that are deep enough to hold your paints without overflowing. Porcelain or plastic palettes are common choices.
I prefer the Masterson Paint Palette Pro, I’ve tried them all and this one checks all the boxes.
Color Selection: Decide on your color palette in advance. Choose a range of colors that suits your subject and style, but avoid overcrowding your palette with too many colors.
If prefer the 6 primary palette plus some neutrals. You can learn more about that in the article below that explains in detail how to mix watercolor like a pro, but very beginner friendly.
Color Placement: Arrange your colors in a logical order. Typically, warm colors (reds, yellows) go on one side, while cool colors (blues, greens) go on the other. Place neutral colors like browns and grays in the middle.
I tend to keep hues together in their family but I have a good idea which blue is warm, and which is cool. Find something that works for you and stick to it.
Space Between Colors: Leave some space between each color well if you are the neat and tidy person, and if you have the space. This prevents unintentional mixing and makes it easier to pick up paint with your brush. If you are like me, a little color mingling is okay.
Here’s an article about the best watercolor supplies for all levels, what we use and recommend.
Part 3: Managing Water on Your Palette
Controlling water on your palette is essential to prevent unwanted dilution of your paints. Follow these tips to manage water effectively:
- Controlled Water Containers: Use two water containers – one for cleaning your brushes and one for adding water to your paints. Keep them separate to avoid contaminating your paint water.
- Paper Towels or Sponge: Keep paper towels or a damp sponge nearby. You can use these to blot excess water from your brush before picking up paint or to clean your brush between colors.
- Mixing Consistency: Be mindful of the water-to-paint ratio when mixing colors on your palette. Start with a small amount of water and gradually add more as needed to achieve the desired consistency.
Part 4: Mixing Paints Without Flooding Your Palette
One of the common challenges in watercolor painting is avoiding the flooding of your palette with excess water when mixing colors. Here’s how to mix paints without creating a mess:
- Palette Control: Tilt your palette slightly to one side when mixing colors. This allows excess water to collect in a corner, away from your paint wells.
- Use a Palette Knife: Consider using a palette knife for mixing instead of your brush. It gives you better control over the amount of water you introduce to the mix.
- Blotting Techniques: If you accidentally add too much water to your mix or if your palette is flooding, use a paper towel or sponge to gently soak up the excess water without disturbing the paint.
Conclusion
Achieving a harmonious and efficient watercolor setup can significantly enhance your painting experience. By following the tips outlined in this blog post, you can create a workspace that encourages creativity, arrange your palette for easy access to colors, manage water effectively, and mix paints without flooding your palette.
For a visual guide on setting up your watercolor workspace and implementing these techniques, be sure to watch our accompanying video tutorial. With practice and patience, you’ll master the art of watercolor painting and create breathtaking works of art that capture the unique beauty of this medium.
