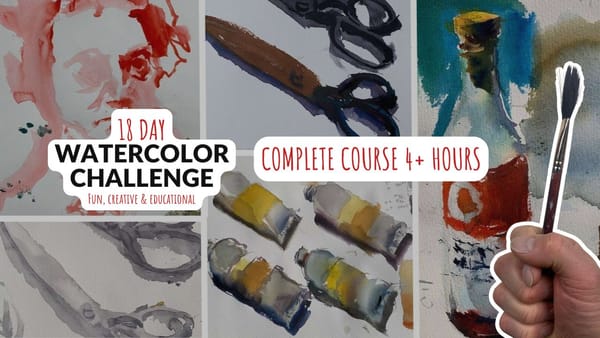
Guide to Painting Watercolor Still Life Artwork
Uncover your creative potential with a guide to painting watercolor still life artwork. Explore everyday objects and expert techniques!


Embark on a delightful journey with this step-by-step watercolor still life tutorial. Designed specifically for beginners, this project offers a simple yet captivating subject, accompanied by easy-to-follow instructions. Join me as we explore various watercolor techniques and create a beautiful masterpiece together. Let’s get started!
Watercolor still life video
Step-by-Step Watercolor Still Life Tutorial
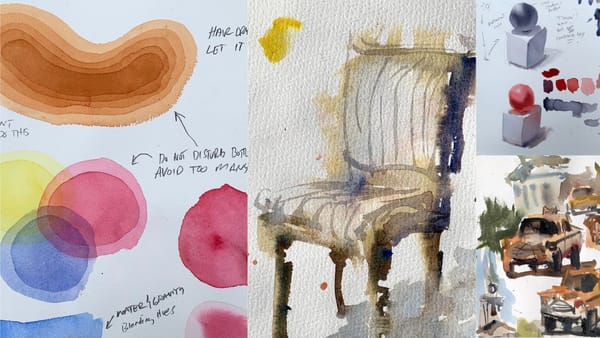
Let’s dive into the watercolor still life step-by-step guide. Follow along to clarify any remaining queries you may have about this project. If you are curious about the watercolor materials used, please scroll down where you will find a list of brushes, hues and such.
Subject Matter
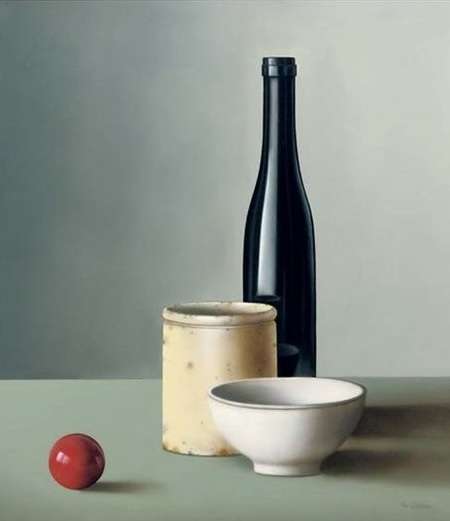
Our focus for this tutorial is “vessels.” We’ll be painting a vase, cups, a bowl, and a red ball—a perfect subject for beginners. As you gain confidence in painting still life, you can gradually explore more complex watercolor ideas.
Setting Goals
Each painting presents an opportunity to address specific challenges and improve your watercolor skills. For instance, if you struggle with landscapes or basic drawing, embrace each artwork as a chance to overcome these obstacles. This two-for-one approach not only enhances your skills but also cultivates a strong work ethic that will sustain your watercolor journey in the long run. Avoiding challenges only leads to frustration, burnout, and eventually giving up.
My Goals for This Painting
Let me share my objectives for this particular artwork:
- Capturing light and shadow effectively.
- Mastering wet-in-wet techniques without encountering issues like cauliflowers and water marks.
- Maintaining crisp colors without excessive saturation.
Step #1: Preliminary Drawing
Begin by sketching the subject using a needle brush or a pencil. Focus on simplicity unless you desire a more realistic representation. Personally, I prefer a loose and playful approach.
Need a guide on how to mix watercolors?
Step #2: Blocking in Shapes with Local Color
Proceed by blocking in all the shapes using mixtures resembling tea. If you’re unfamiliar with this technique, refer to this article covering the basics of watercolor painting techniques.
Step #3: Building Up Colors with Thicker Paint
Enhance the colors by applying charging techniques. Load the brush with thicker paint and drop it into the washes to achieve the desired effect.
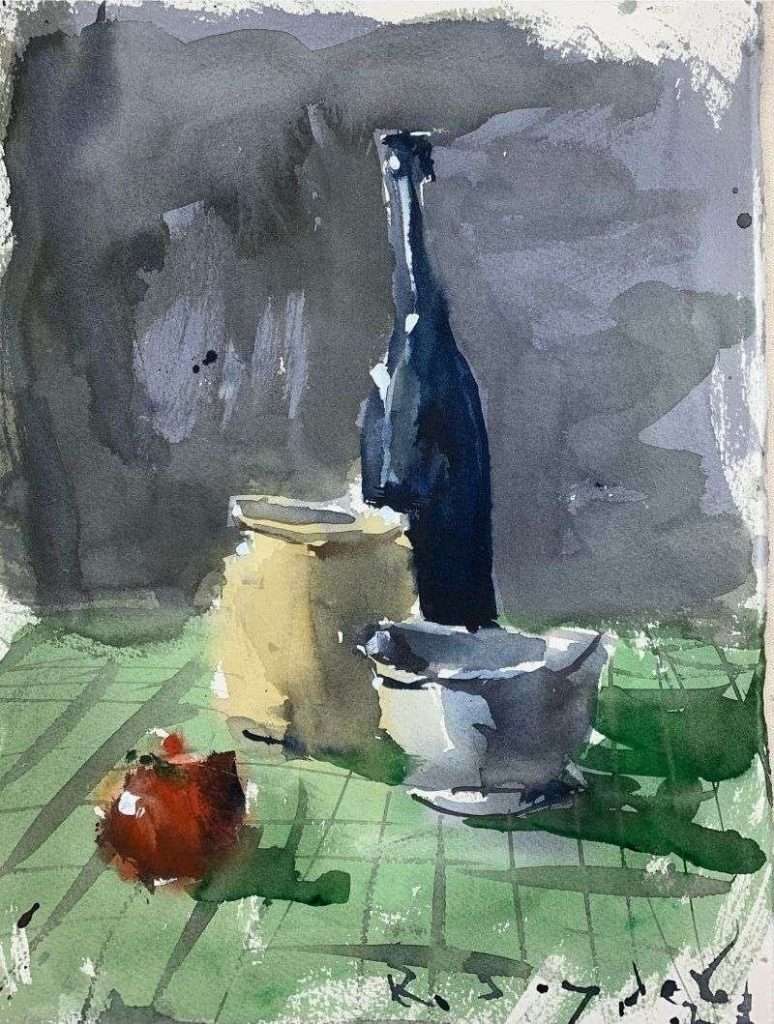
Step #4: Adding Darker Shadows
Start painting the light and shadows. Leave a strip of white paper on the black vase, and if the reflection appears too rigid, soften it with a clean, damp brush.
Step #5: Painting Bowl Details
Utilize a dagger brush (or any small liner/pointed round brush) to paint intricate details on the bowl.
Step #6: Depicting Cast Shadows
Using darker green and milk-mixtures, paint the cast shadows. These mixtures consist of thicker paint, with more pigment and less water.
Step #7: Layering the Background
Apply another layer of darker hues to build up the background. This step allows you to tidy up the edges surrounding the vessels using negative space painting.
Step #8: Final Touches
The painting is nearly complete! Add patterns to the tablecloth and incorporate a few intense colors. Step back and observe the artwork from a distance. This perspective will provide fresh insights and help determine any final adjustments needed.
Suggested Material Checklist
Materials can make or break the outcome of a watercolor study. Watch the video that covers the best watercolor materials if you need more specifics about color choices, brush sizes and such. Basically, it’s exactly what I use and recommend for all levels.
Watercolor Paints: Opt for artist-grade watercolor paints in a range of colors. Choose a basic palette that includes six primary colors (one cool and warm hue for each one including red, blue, and yellow) along with earth tones for a versatile collection.
If you aren’t aware of the six primary palette, then check out our in-depth article on how to mix watercolors for beginners. It has the exact hues I use for every painting. And, if I make changes, I always update the article so you know the exact hues that get the best results.
Brushes: Invest in a set of good-quality watercolor brushes with different shapes and sizes. Round brushes are excellent for detailed work, while flat brushes are great for larger washes. I’d recommend one medium and one large pointed round. Then get a large mop brush that will handle those initial washed that are applied in the very beginning.
You only need three brushes to do most of the heavy lifting! However, I do recommend having a dagger and possibly and Motler on hand as well. Check out the article I wrote on how to choose the best watercolor brushes if you have questions on the exact brands, sizes and such.
Paper: I highly recommend selecting watercolor paper specifically designed for this medium. Look for papers labeled “cold-pressed” or “hot-pressed” to suit your preferred texture. Experiment with different weights and brands to find the one that suits your style. Most beginners choose 140 lb. cold press to start their journey. Hot press tends to be a little slick and most used for highly detailed work and portraits.
Avoid cheap, wood pulp papers as they don’t react properly to washes and other techniques. These cheaper papers tend to break down quickly and don’t age well either, basically yellowing over time. Be sure to read the how to choose the best watercolor paper article when you have time.
If you aren’t aware of the six primary palette, then check out our in-depth article on how to mix watercolors for beginners. It has the exact hues I use for every painting. And, if I make changes, I always update the article so you know the exact hues that get the best results.
Palette: A palette is essential for mixing and diluting your watercolors. Choose a palette with wells to hold different colors and a large mixing area. Small palettes tend to get dirty too quick and I found it difficult to have enough free space to mix enough colors without having to stop everything to clean up. The Masterson Pro palette works great and available at Amazon and Blick Art.
Water Containers: Have at least two containers for water—one for rinsing your brushes and another for clean water. Make sure the containers aren’t too small, and I would recommend plastic over glass. I’ve had plenty of studio accidents and cleaning up shattered glass isn’t ideal when in a creative mode.
Masking Tape and Drawing Board: Masking tape helps secure your paper to a drawing board, keeping it flat and preventing it from warping. The tape is optional and depends if you prefer the clean edges. In the beginning you will most likely focus on sketches and studies, so maybe pass until you determine later on if you need it.
A smooth, firm board is a must! I recommend Gator foam board as it’s very sturdy, smooth and durable. Fairly inexpensive and light weight to boot. That covers materials, let’s move on to skills you need to start watercolor painting.
Conclusion
I hope you thoroughly enjoyed this watercolor painting tutorial. If you have any questions or seek further clarification, don’t hesitate to leave a comment below. I’m more than happy to assist you. Now, let’s pick up our brushes and embark on a joyful painting journey together. Happy painting!