Paint Loose Urban Watercolor Landscapes
Dive deep into the world of watercolor urban landscapes with invaluable tips that will help you infuse life and spontaneity into your artwork.
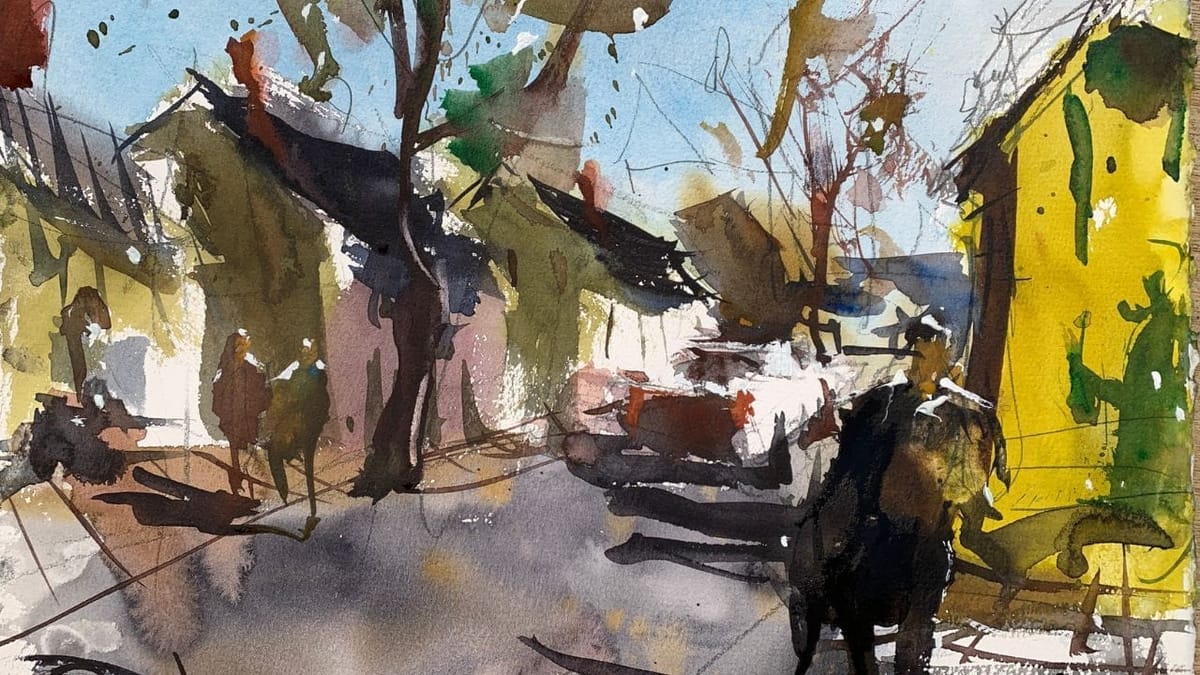
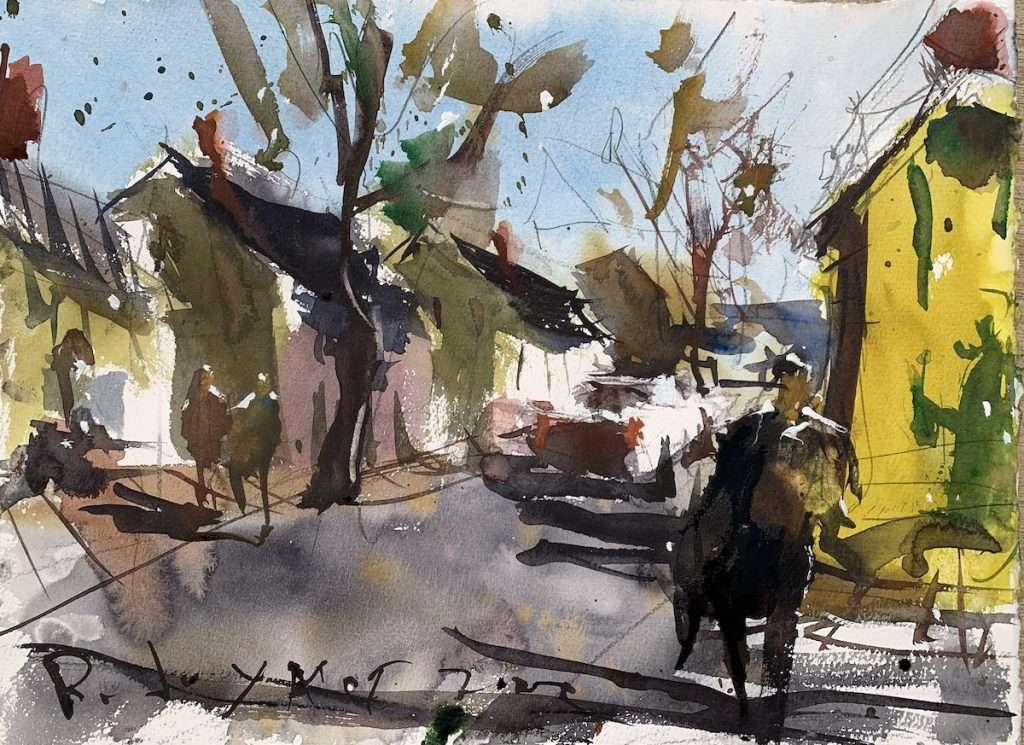
In this tutorial, we’ll dive deep into the world of watercolor urban landscapes, sharing invaluable tips that will help you infuse life and spontaneity into your artwork. To help facilitate the lesson I will use a photo reference taken while visiting Williamsburg, VA (see below).
Achieving Mastery in Creating Expressive Urban Landscapes with Watercolors
Watercolor painting has a magical way of capturing the vibrant energy and dynamic atmosphere of urban landscapes, IF the artist get’s out of the way and let it do its thing!. Creating loose and expressive urban scenes with watercolors requires a unique blend of technique, intuition, and a willingness to embrace the unpredictable nature of the medium. I hope the you see this approach in the video, and finished art.

Selecting Your Scene
- Choose a Focal Point: Begin by selecting a compelling focal point within the urban landscape. This could be a bustling street corner, a historic building, or even a quirky street vendor. Identifying a central point of interest will guide the viewer’s eye through your painting.
- Reference Gathering: Collect reference photos of your chosen urban scene, ensuring you capture different angles, lighting conditions, and details. These references will be your visual guide as you work on your painting.
Embracing the Loose Approach
- Minimalist Sketching: Start with a light pencil sketch that outlines the basic shapes and structures of your scene. Keep your lines simple and avoid too much detail, as the goal is to capture the essence rather than intricacies.
- Broad Brushstrokes: Use larger brushes and bold, sweeping brushstrokes to lay down the initial washes of color. Apply the paint in a loose manner, allowing the colors to mix and mingle on the paper.
- Wet-on-Wet Technique: To achieve a spontaneous feel, wet the paper first before applying the paint. This technique lets the colors bleed and blend, creating soft edges that evoke the dynamic nature of urban scenes.
Playing with Color and Texture
- Limited Palette: Urban landscapes often feature a diverse range of colors. However, for a cohesive and harmonious painting, consider using a limited color palette that captures the mood and essence of the scene.
- Texture Magic: Experiment with different techniques to create texture. Use sponges, salt, or plastic wrap to add visual interest to building facades, roads, and other elements in your composition.
Capturing the Urban Vibe
- Suggestive Detailing: Instead of meticulously rendering every detail, focus on suggesting key elements. A few well-placed lines and shapes can convey the essence of a busy street or a bustling market.
- Lost and Found Edges: Play with lost and found edges to create depth and dimension. Allow some areas to be sharp and well-defined, while letting others blur into the background, adding a sense of distance and atmosphere.
Adding Final Touches
- Finer Details: As your initial washes dry, introduce finer details using smaller brushes. Highlight architectural features, windows, signage, and people to bring life to your urban landscape.
- Spontaneous Accents: Use splatters, drips, or flicks of paint to introduce a touch of spontaneity and movement. This can mimic the hustle and bustle of urban life.
Looking for more fresh watercolor painting ideas?
Suggested Material Checklist
Materials can make or break the outcome of a watercolor study. Watch the video that covers the best watercolor materials if you need more specifics about color choices, brush sizes and such. Basically, it’s exactly what I use and recommend for all levels.
Watercolor Paints: Opt for artist-grade watercolor paints in a range of colors. Choose a basic palette that includes six primary colors (one cool and warm hue for each one including red, blue, and yellow) along with earth tones for a versatile collection.
If you aren’t aware of the six primary palette, then check out our in-depth article on how to mix watercolors for beginners. It has the exact hues I use for every painting. And, if I make changes, I always update the article so you know the exact hues that get the best results.
Brushes: Invest in a set of good-quality watercolor brushes with different shapes and sizes. Round brushes are excellent for detailed work, while flat brushes are great for larger washes. I’d recommend one medium and one large pointed round. Then get a large mop brush that will handle those initial washed that are applied in the very beginning.
You only need three brushes to do most of the heavy lifting! However, I do recommend having a dagger and possibly and Motler on hand as well. Check out the article I wrote on how to choose the best watercolor brushes if you have questions on the exact brands, sizes and such.
Paper: I highly recommend selecting watercolor paper specifically designed for this medium. Look for papers labeled “cold-pressed” or “hot-pressed” to suit your preferred texture. Experiment with different weights and brands to find the one that suits your style. Most beginners choose 140 lb. cold press to start their journey. Hot press tends to be a little slick and most used for highly detailed work and portraits.
Avoid cheap, wood pulp papers as they don’t react properly to washes and other techniques. These cheaper papers tend to break down quickly and don’t age well either, basically yellowing over time. Be sure to read the how to choose the best watercolor paper article when you have time.
If you aren’t aware of the six primary palette, then check out our in-depth article on how to mix watercolors for beginners. It has the exact hues I use for every painting. And, if I make changes, I always update the article so you know the exact hues that get the best results.
Palette: A palette is essential for mixing and diluting your watercolors. Choose a palette with wells to hold different colors and a large mixing area. Small palettes tend to get dirty too quick and I found it difficult to have enough free space to mix enough colors without having to stop everything to clean up. The Masterson Pro palette works great and available at Amazon and Blick Art.
Water Containers: Have at least two containers for water—one for rinsing your brushes and another for clean water. Make sure the containers aren’t too small, and I would recommend plastic over glass. I’ve had plenty of studio accidents and cleaning up shattered glass isn’t ideal when in a creative mode.
Masking Tape and Drawing Board: Masking tape helps secure your paper to a drawing board, keeping it flat and preventing it from warping. The tape is optional and depends if you prefer the clean edges. In the beginning you will most likely focus on sketches and studies, so maybe pass until you determine later on if you need it.
A smooth, firm board is a must! I recommend Gator foam board as it’s very sturdy, smooth and durable. Fairly inexpensive and light weight to boot. That covers materials, let’s move on to skills you need to start watercolor painting.
Conclusion
Creating loose urban landscapes with watercolors is an exhilarating journey that encourages you to break free from rigidity and embrace the organic flow of the medium.
Through a balanced combination of selective detailing, expressive brushwork, and a willingness to let go of perfection, you can capture the lively spirit and vibrant character of bustling city scenes. Armed with these expert tips, you’re now equipped to embark on your artistic adventure and master the captivating art of loose urban landscape watercolor painting.
