How To Paint Watercolor Landscapes Using Photos
Immerse yourself in how to paint watercolor landscapes using photos. Capture the beauty of nature with expert guidance and boundless creativity.
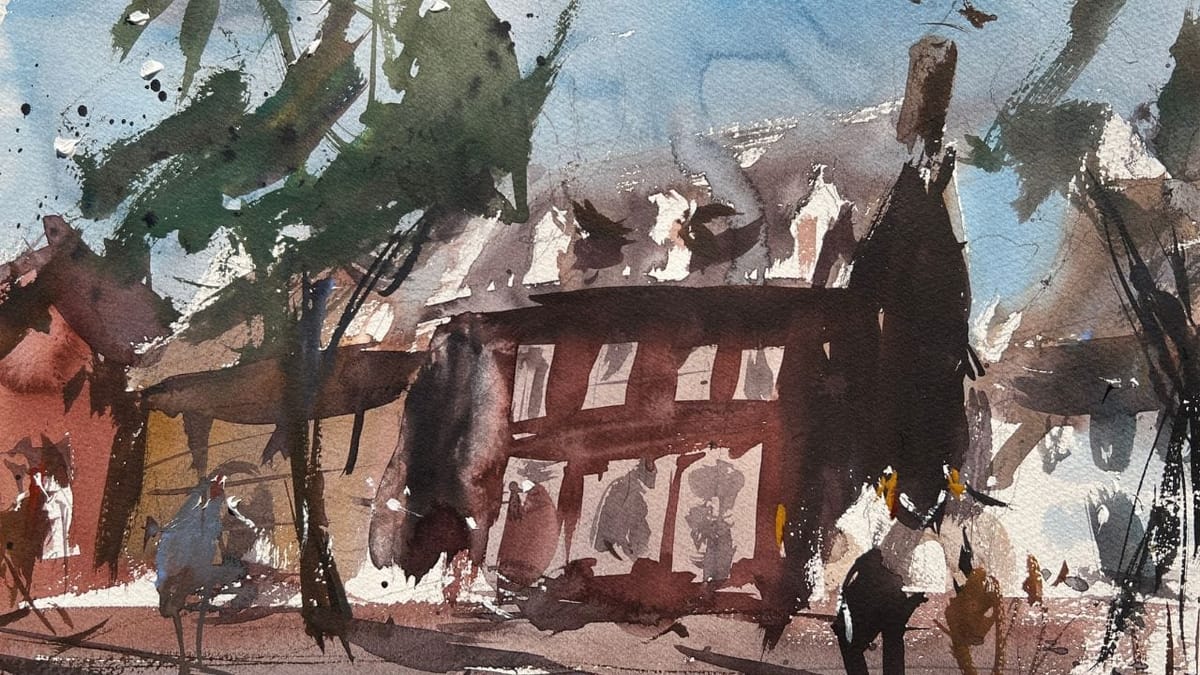
I don’t know about you, buy I lean HEAVY on using photo references to get inspired. It may be places we have visited, cherished vacation destinations, and much more. This lesson will provide insights on creating magnificent watercolor, acrylic, and mixed media artwork using photographs. Although these tips are universally applicable, watercolor will be utilized as the primary medium in this illustration.
Discover Five Valuable Techniques for Painting from Photo References
Outlined below are five essential steps to follow when painting from photographs. This guide is applicable to artists of all skill levels, regardless of their chosen medium or subject matter. The crucial aspect is to consistently formulate a plan or a series of steps when engaging in artistic endeavors. The concepts shared in this article are equally effective for painting from real-life observations or outdoor settings.
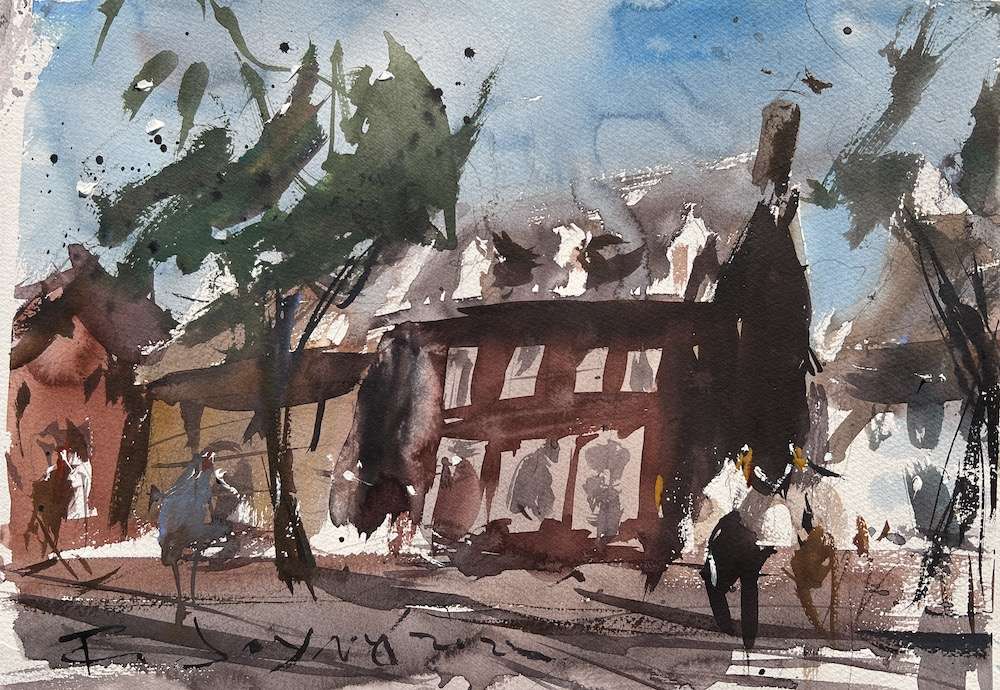
The stunning watercolor landscape showcased below was created by employing these precise steps. If you are eager to expand your knowledge, let’s embark on this enlightening journey together.
Curious about my materials? Let’s have a look at this before we take it to the next level…
Suggested Material Checklist
Materials can make or break the outcome of a watercolor study. Watch the video that covers the best watercolor materials if you need more specifics about color choices, brush sizes and such. Basically, it’s exactly what I use and recommend for all levels.
Watercolor Paints: Opt for artist-grade watercolor paints in a range of colors. Choose a basic palette that includes six primary colors (one cool and warm hue for each one including red, blue, and yellow) along with earth tones for a versatile collection.
If you aren’t aware of the six primary palette, then check out our in-depth article on how to mix watercolors for beginners. It has the exact hues I use for every painting. And, if I make changes, I always update the article so you know the exact hues that get the best results.
Brushes: Invest in a set of good-quality watercolor brushes with different shapes and sizes. Round brushes are excellent for detailed work, while flat brushes are great for larger washes. I’d recommend one medium and one large pointed round. Then get a large mop brush that will handle those initial washed that are applied in the very beginning.
You only need three brushes to do most of the heavy lifting! However, I do recommend having a dagger and possibly and Motler on hand as well. Check out the article I wrote on how to choose the best watercolor brushes if you have questions on the exact brands, sizes and such.
Paper: I highly recommend selecting watercolor paper specifically designed for this medium. Look for papers labeled “cold-pressed” or “hot-pressed” to suit your preferred texture. Experiment with different weights and brands to find the one that suits your style. Most beginners choose 140 lb. cold press to start their journey. Hot press tends to be a little slick and most used for highly detailed work and portraits.
Avoid cheap, wood pulp papers as they don’t react properly to washes and other techniques. These cheaper papers tend to break down quickly and don’t age well either, basically yellowing over time. Be sure to read the how to choose the best watercolor paper article when you have time.
If you aren’t aware of the six primary palette, then check out our in-depth article on how to mix watercolors for beginners. It has the exact hues I use for every painting. And, if I make changes, I always update the article so you know the exact hues that get the best results.
Palette: A palette is essential for mixing and diluting your watercolors. Choose a palette with wells to hold different colors and a large mixing area. Small palettes tend to get dirty too quick and I found it difficult to have enough free space to mix enough colors without having to stop everything to clean up. The Masterson Pro palette works great and available at Amazon and Blick Art.
Water Containers: Have at least two containers for water—one for rinsing your brushes and another for clean water. Make sure the containers aren’t too small, and I would recommend plastic over glass. I’ve had plenty of studio accidents and cleaning up shattered glass isn’t ideal when in a creative mode.
Masking Tape and Drawing Board: Masking tape helps secure your paper to a drawing board, keeping it flat and preventing it from warping. The tape is optional and depends if you prefer the clean edges. In the beginning you will most likely focus on sketches and studies, so maybe pass until you determine later on if you need it.
A smooth, firm board is a must! I recommend Gator foam board as it’s very sturdy, smooth and durable. Fairly inexpensive and light weight to boot. That covers materials, let’s move on to skills you need to start watercolor painting.
Step One: Find Your Photo Reference
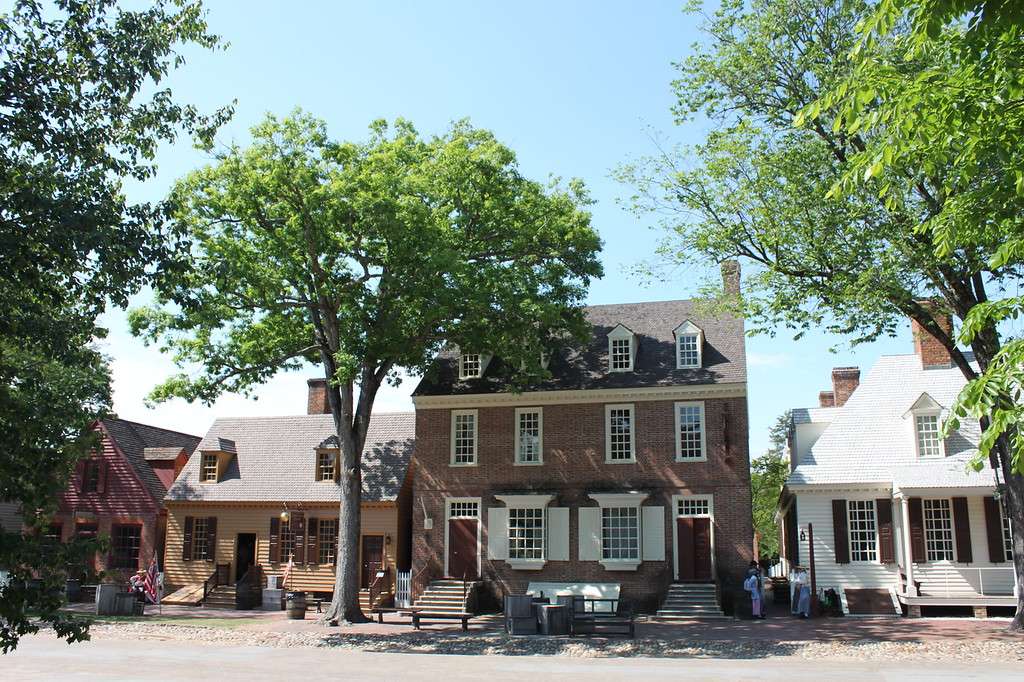
Discover an image that resonates with you. Establishing a personal connection with the subjects depicted is crucial for creating artwork that reflects your unique life experiences. While I acknowledge that this is not an absolute requirement, in my humble opinion, it greatly enhances the creative process.
Shown above is a photograph capturing the essence of Williamsburg, VA. Specifically, it portrays Colonial Williamsburg, a place conveniently situated near my residence.
Step Two: Give Image a Blurred Effect
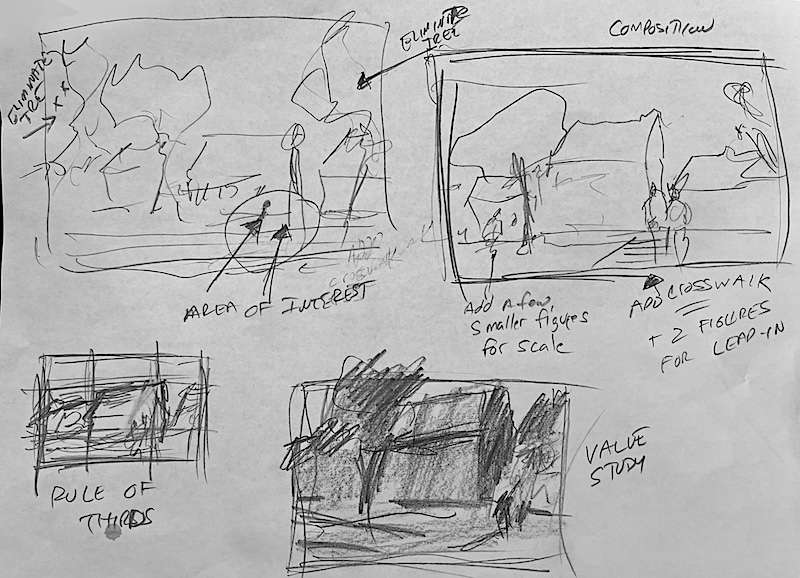
Induce a blur effect on the image by squinting your eyes or utilizing digital tools. This technique effectively merges similar tonal values and minimizes intricate details. Additionally, converting the image to grayscale can be beneficial. By eliminating hues, it facilitates the simplification process and prevents potential complications.
Step Three: Simplify and Connect Values
Identify opportunities to unify similar values and hues into larger, more cohesive shapes. For instance, although a red and blue building may exhibit different hues, they could share the same value. Similarly, the shadows cast on trees and shrubs might possess the same tonal values as the shadows on figures or their garments. If these connections aren’t readily apparent in the reference photo, it becomes your responsibility as an artist to establish them.
Remember, as artists, we have the power to modify and transform anything. We are not bound or restricted by the original photographs. At least, that’s how I perceive it!
While it may appear somewhat untidy, this is my preferred approach to simplifying subjects. This preliminary step significantly streamlines the painting process, reducing the complexity from thousands of details to just twenty distinct shapes.
Step Four: Choose a Palette
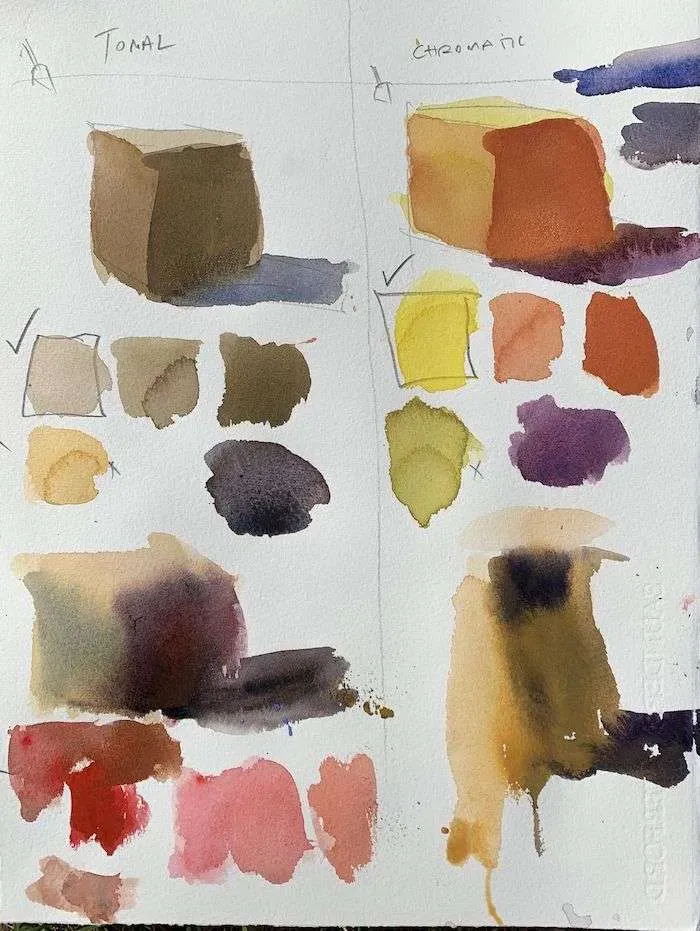
Select a color scheme that harmonizes effectively with your artwork. There are various approaches to accomplish this, ranging from employing traditional combinations based on the color wheel to utilizing personal preferences such as a tonal or chromatic palette. In the present example, I opted for a tonal palette, wherein most hues are desaturated and subdued, emphasizing a sense of grayscale.
Step Five: Complete Composition Drawing with Point of Interest (see image above)
Create a swift contour drawing based on the preceding steps, while incorporating personal touches and enhancing the focal point. In this particular photo reference example, I introduced figures crossing the street, included a crosswalk, and added a few additional figures in the middle-ground to infuse vitality into the scene.
Conclusion
I trust you found these tips on painting with photo references enjoyable and informative. Implementing these ideas has personally aided me in avoiding common errors, saving both time and money, and ultimately producing commendable artwork.
Please feel free to share your thoughts on these five steps in the comments section below. I value your feedback and insights.
