How to Paint Awesome Watercolor Still Life Art
Embark on a journey of how to paint awesome watercolor still life art. Capture the beauty of everyday objects with our expert guidance.
Are you eager to uncover valuable tips on painting a straightforward still life as a beginner? This captivating subject offers a wealth of opportunities as you can readily utilize everyday objects and paint from real-life references. In this guide, we will not only help you create a stunning still life composition but also delve into the art of negative space painting techniques. Get ready to embark on a journey of artistic exploration!
Beginner still life painting tips using negative space techniques
Watercolor painting can be a challenging medium to master, but it also offers tremendous rewards. In this extensive blog post, we will delve into the world of watercolor and explore the technique of painting negative space. By utilizing negative space, we can create captivating compositions and infuse our paintings with depth. Whether you are a novice or just starting your artistic journey, this beginner-friendly tutorial will guide you step by step.
One crucial aspect of successfully employing negative space is to adopt a light-to-dark approach. Essentially, this means beginning with lighter colors and gradually progressing towards darker shades as you paint.
Negative space is a fascinating design technique that can elevate your artwork. Throughout this article, we will examine various ways in which negative space is utilized and discover how you can incorporate it into your own designs. It is a powerful tool for generating striking contrasts between foreground and background elements, as well as establishing a sense of depth within your images.
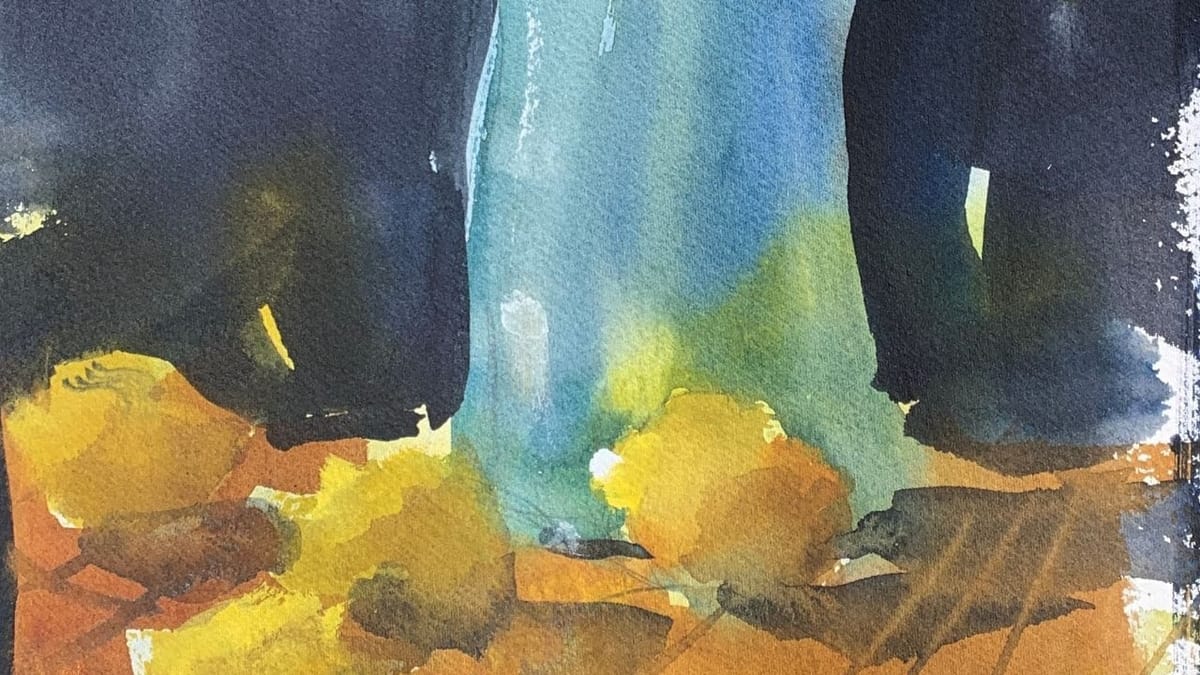
Before you even touch your brush to the paper, take a few moments to contemplate washes. How can you strategically incorporate washes with specific hues that can later serve as parts of the background and transform into objects by adding darker values?
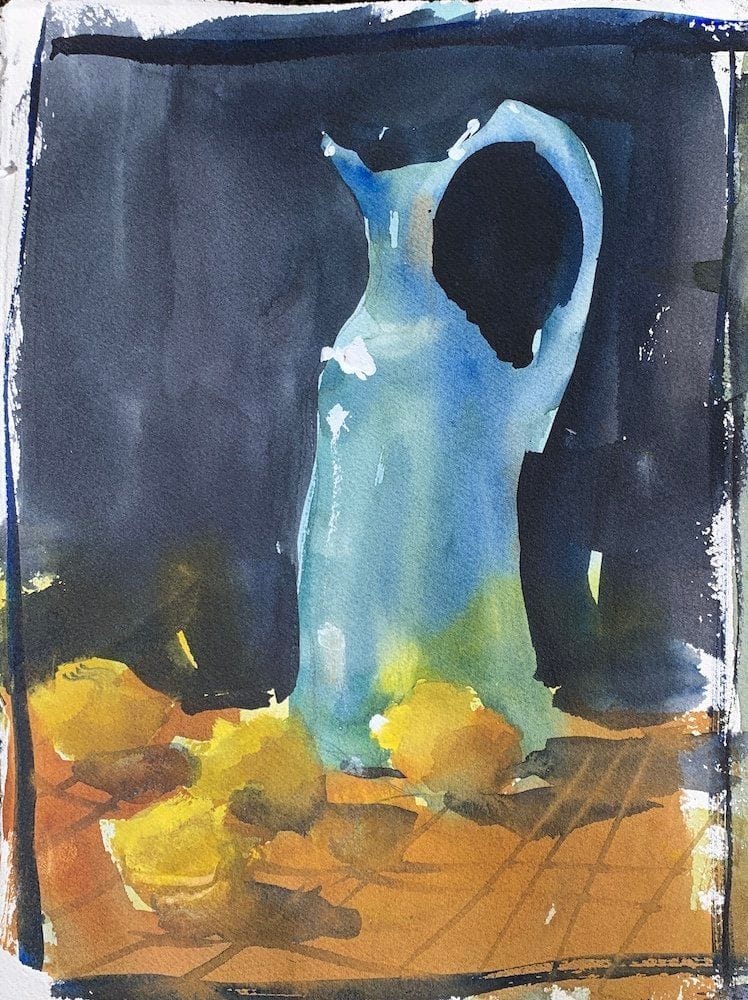
This process doesn’t occur by chance. In the accompanying video, you will witness the initial painting of lemons at an early stage, followed by the meticulous carving out of their shapes using darker hues added to the background and tabletop.
The choice of materials is crucial! To achieve satisfactory results, it is essential to utilize the appropriate watercolor supplies. While inferior paint and paper can be used, they often pale in comparison to professional-grade materials. This doesn’t imply that you must possess top-of-the-line equipment. You don’t need a $200 brush to achieve the desired outcome. We will also provide recommendations for the best watercolor supplies suitable for both beginners and professional artists.
To complement this guide, we have included a collection of images from the tutorial, allowing you to visualize the step-by-step process and gain inspiration for your own watercolor endeavors.
The benefits of painting household objects from real life
Painting simple still life compositions using household objects is not only easy but also highly educational. It provides a wonderful opportunity for beginners to enhance their artistic skills and understanding of various elements, such as form, light, and shadow.
By painting from real-life objects, rather than relying solely on photographs, artists can engage with their subjects in a more immersive and intimate way. This hands-on approach allows for a deeper observation of details, textures, and colors, leading to a more accurate and authentic representation.
Additionally, painting from real life enables artists to develop their ability to interpret and capture the nuances of objects, enhancing their artistic growth and visual perception. It is a fulfilling and enriching experience that brings both artistic and educational value to the creative journey.
Suggested Material Checklist
Materials can make or break the outcome of a watercolor study. Watch the video that covers the best watercolor materials if you need more specifics about color choices, brush sizes and such. Basically, it’s exactly what I use and recommend for all levels.
Watercolor Paints: Opt for artist-grade watercolor paints in a range of colors. Choose a basic palette that includes six primary colors (one cool and warm hue for each one including red, blue, and yellow) along with earth tones for a versatile collection.
If you aren’t aware of the six primary palette, then check out our in-depth article on how to mix watercolors for beginners. It has the exact hues I use for every painting. And, if I make changes, I always update the article so you know the exact hues that get the best results.
Brushes: Invest in a set of good-quality watercolor brushes with different shapes and sizes. Round brushes are excellent for detailed work, while flat brushes are great for larger washes. I’d recommend one medium and one large pointed round. Then get a large mop brush that will handle those initial washed that are applied in the very beginning.
You only need three brushes to do most of the heavy lifting! However, I do recommend having a dagger and possibly and Motler on hand as well. Check out the article I wrote on how to choose the best watercolor brushes if you have questions on the exact brands, sizes and such.
Paper: I highly recommend selecting watercolor paper specifically designed for this medium. Look for papers labeled “cold-pressed” or “hot-pressed” to suit your preferred texture. Experiment with different weights and brands to find the one that suits your style. Most beginners choose 140 lb. cold press to start their journey. Hot press tends to be a little slick and most used for highly detailed work and portraits.
Avoid cheap, wood pulp papers as they don’t react properly to washes and other techniques. These cheaper papers tend to break down quickly and don’t age well either, basically yellowing over time. Be sure to read the how to choose the best watercolor paper article when you have time.
If you aren’t aware of the six primary palette, then check out our in-depth article on how to mix watercolors for beginners. It has the exact hues I use for every painting. And, if I make changes, I always update the article so you know the exact hues that get the best results.
Palette: A palette is essential for mixing and diluting your watercolors. Choose a palette with wells to hold different colors and a large mixing area. Small palettes tend to get dirty too quick and I found it difficult to have enough free space to mix enough colors without having to stop everything to clean up. The Masterson Pro palette works great and available at Amazon and Blick Art.
Water Containers: Have at least two containers for water—one for rinsing your brushes and another for clean water. Make sure the containers aren’t too small, and I would recommend plastic over glass. I’ve had plenty of studio accidents and cleaning up shattered glass isn’t ideal when in a creative mode.
Masking Tape and Drawing Board: Masking tape helps secure your paper to a drawing board, keeping it flat and preventing it from warping. The tape is optional and depends if you prefer the clean edges. In the beginning you will most likely focus on sketches and studies, so maybe pass until you determine later on if you need it.
A smooth, firm board is a must! I recommend Gator foam board as it’s very sturdy, smooth and durable. Fairly inexpensive and light weight to boot. That covers materials, let’s move on to skills you need to start watercolor painting.
Conclusion
Embark on your journey of painting negative space with watercolors and unlock the potential for creating captivating artworks. Let’s dive in!
