How to Paint Rural Watercolor Landscapes Video Tutorial
Join us for how to paint rural landscapes video tutorial which is packed ideas and tips for creating your next masterpiece. Let's get started!


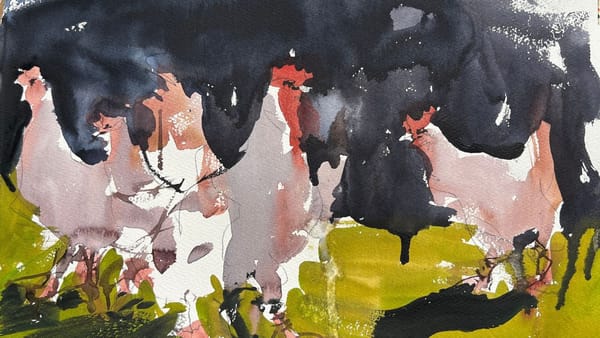
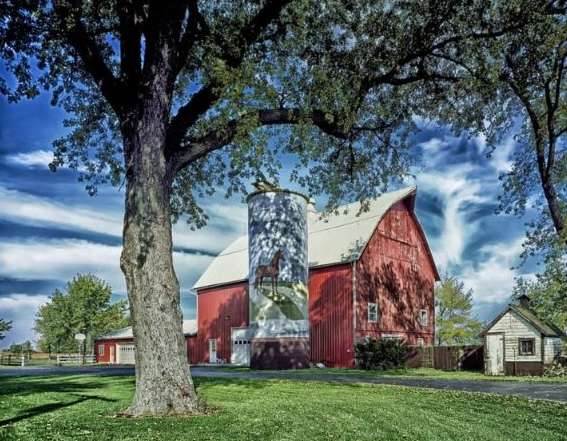
In today’s tutorial, I’m thrilled to share some valuable insights on how to create a charming rural watercolor landscape. So, grab your brushes and join me as we embark on this creative journey together.
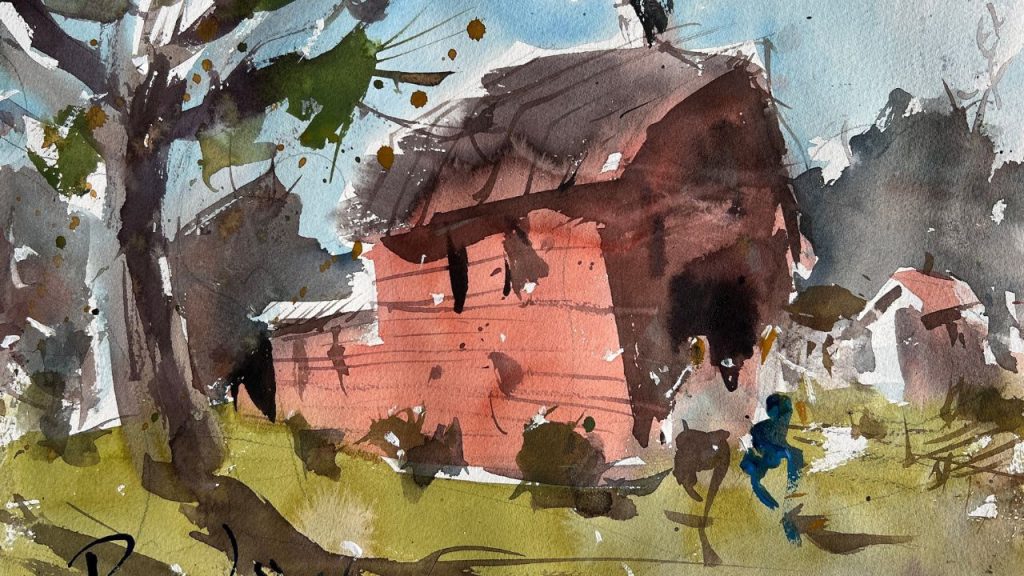
Rural landscape video demo
Essential Tips for Painting a Simple Rural Landscape with Watercolors
The first crucial step is to ensure you have the right materials at your disposal. Opt for artist-grade paints, high-quality paper, and reliable brushes. However, you don’t have to break the bank to acquire these supplies. Instead, consider investing in a selection of limited hues, buy paper in bulk, and utilize synthetic brushes. Be mindful, though, brushes can be quite pricey.
Step-by-step guide to painting rural landscapes
Moving on to step two, it’s time to start laying in the drawing, beginning with the largest shape or line. For landscapes, the horizon line usually takes precedence. Continue adding shapes from large to small, remembering to avoid unnecessary details that might clutter the paper and lead to a tightly rendered artwork. A common mistake for beginners watercolorists is they add way too many details in their layout drawing and become very rigid as they paint.
Step three involves starting with thin, tea-like mixtures of local hues. The initial wash should have a light value, following the same system I use. However, be cautious not to make it too thin, as it may appear weak. It takes practice to strike the right balance, as watercolors tend to dry approximately 30% lighter in value. A great exercise is to de a series of swatches that go from very thin, or watered down, to very thick, little to no water. Observe each hue as it’s applied and then go back and study them once it dries.
In step four, allow your painting to dry naturally or expedite the process with a hairdryer. This grants you greater control over the subsequent stages. Now, you can begin adding darker hues, which often serve as the shadows in my compositions. At this point, your artwork will gradually come to life.
Be careful with the dryer, it can cause paper damage if it gets too close, and you can push the paint around too much, too fast and cause some undesired water marks.
Step five invites you to incorporate selective details. These could range from windows and figures to background trees and more. You’ll be pleasantly surprised by how few details you actually need. Take it slow and observe the scene in front of you, rather than relying solely on a photo reference.
Finally, step six involves introducing highlights to enhance certain areas. White gouache is an excellent choice, or you can opt for matte heavy body acrylics.
Suggested Material Checklist
Materials can make or break the outcome of a watercolor study. Watch the video that covers the best watercolor materials if you need more specifics about color choices, brush sizes and such. Basically, it’s exactly what I use and recommend for all levels.
Watercolor Paints: Opt for artist-grade watercolor paints in a range of colors. Choose a basic palette that includes six primary colors (one cool and warm hue for each one including red, blue, and yellow) along with earth tones for a versatile collection.
If you aren’t aware of the six primary palette, then check out our in-depth article on how to mix watercolors for beginners. It has the exact hues I use for every painting. And, if I make changes, I always update the article so you know the exact hues that get the best results.
Brushes: Invest in a set of good-quality watercolor brushes with different shapes and sizes. Round brushes are excellent for detailed work, while flat brushes are great for larger washes. I’d recommend one medium and one large pointed round. Then get a large mop brush that will handle those initial washed that are applied in the very beginning.
You only need three brushes to do most of the heavy lifting! However, I do recommend having a dagger and possibly and Motler on hand as well. Check out the article I wrote on how to choose the best watercolor brushes if you have questions on the exact brands, sizes and such.
Paper: I highly recommend selecting watercolor paper specifically designed for this medium. Look for papers labeled “cold-pressed” or “hot-pressed” to suit your preferred texture. Experiment with different weights and brands to find the one that suits your style. Most beginners choose 140 lb. cold press to start their journey. Hot press tends to be a little slick and most used for highly detailed work and portraits.
Avoid cheap, wood pulp papers as they don’t react properly to washes and other techniques. These cheaper papers tend to break down quickly and don’t age well either, basically yellowing over time. Be sure to read the how to choose the best watercolor paper article when you have time.
If you aren’t aware of the six primary palette, then check out our in-depth article on how to mix watercolors for beginners. It has the exact hues I use for every painting. And, if I make changes, I always update the article so you know the exact hues that get the best results.
Palette: A palette is essential for mixing and diluting your watercolors. Choose a palette with wells to hold different colors and a large mixing area. Small palettes tend to get dirty too quick and I found it difficult to have enough free space to mix enough colors without having to stop everything to clean up. The Masterson Pro palette works great and available at Amazon and Blick Art.
Water Containers: Have at least two containers for water—one for rinsing your brushes and another for clean water. Make sure the containers aren’t too small, and I would recommend plastic over glass. I’ve had plenty of studio accidents and cleaning up shattered glass isn’t ideal when in a creative mode.
Masking Tape and Drawing Board: Masking tape helps secure your paper to a drawing board, keeping it flat and preventing it from warping. The tape is optional and depends if you prefer the clean edges. In the beginning you will most likely focus on sketches and studies, so maybe pass until you determine later on if you need it.
A smooth, firm board is a must! I recommend Gator foam board as it’s very sturdy, smooth and durable. Fairly inexpensive and light weight to boot. That covers materials, let’s move on to skills you need to start watercolor painting.
Wrap up
With these valuable tips and techniques in your artistic arsenal, you’re well-equipped to embark on your own watercolor journey through the picturesque rural landscapes. So, grab your brushes, let your creativity flow, and enjoy the process of bringing your watercolor landscapes to life. Happy painting!