How to Paint Loose Watercolor Cityscapes
Explore the art of how to paint loose watercolor cityscapes. Capture urban beauty with expert guidance and unleash your creativity on paper.
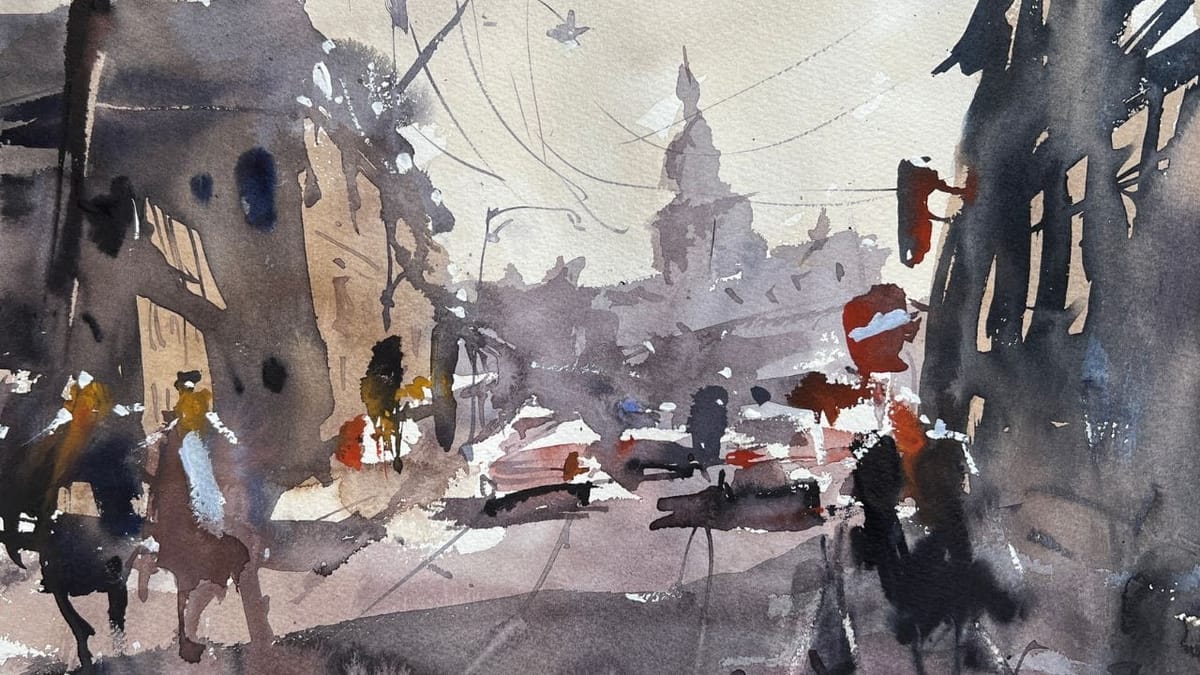
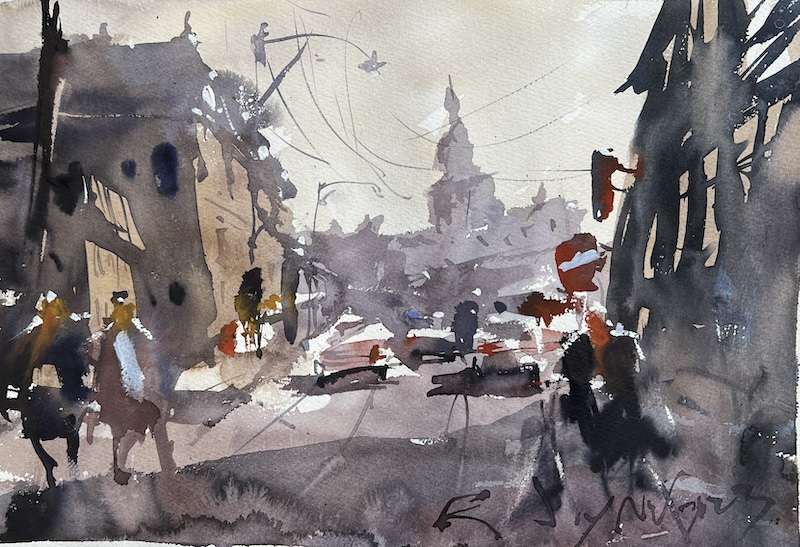
In this tutorial, I will guide you through the process step by step, helping you create a loose cityscape watercolor painting. Cityscapes are exciting to paint, prolly my favorite subject apart for the good ol’ rustic harbors of Maine.
Capturing the bustling energy, architectural details, and dynamic atmosphere of a cityscape can seem challenging, but with the right approach and techniques, you can paint a loose and vibrant watercolor cityscape that truly shines. The key is to simplify! Leave out more than you put in!
Joining Fanatic Plus helps support the site and gives you full access to every premium course and in-depth tutorial.
👉 Join Fanatic Plus
How to Paint a Loose Watercolor Cityscape Step-by-Step Tutorial
Discover some tips for creating a dynamic and abstract watercolor landscape that captures the vibrant energy of a bustling downtown scene. In the accompanying video above you’ll witness the creation process and gain valuable insights on the techniques employed. Before we dive in, let’s begin with a discussion on the essential materials required for this artistic endeavor.
Suggested Material Checklist
Materials can make or break the outcome of a watercolor study. Watch the video that covers the best watercolor materials if you need more specifics about color choices, brush sizes and such. Basically, it’s exactly what I use and recommend for all levels.
Watercolor Paints: Opt for artist-grade watercolor paints in a range of colors. Choose a basic palette that includes six primary colors (one cool and warm hue for each one including red, blue, and yellow) along with earth tones for a versatile collection.
If you aren’t aware of the six primary palette, then check out our in-depth article on how to mix watercolors for beginners. It has the exact hues I use for every painting. And, if I make changes, I always update the article so you know the exact hues that get the best results.
Brushes: Invest in a set of good-quality watercolor brushes with different shapes and sizes. Round brushes are excellent for detailed work, while flat brushes are great for larger washes. I’d recommend one medium and one large pointed round. Then get a large mop brush that will handle those initial washed that are applied in the very beginning.
You only need three brushes to do most of the heavy lifting! However, I do recommend having a dagger and possibly and Motler on hand as well. Check out the article I wrote on how to choose the best watercolor brushes if you have questions on the exact brands, sizes and such.
Paper: I highly recommend selecting watercolor paper specifically designed for this medium. Look for papers labeled “cold-pressed” or “hot-pressed” to suit your preferred texture. Experiment with different weights and brands to find the one that suits your style. Most beginners choose 140 lb. cold press to start their journey. Hot press tends to be a little slick and most used for highly detailed work and portraits.
Avoid cheap, wood pulp papers as they don’t react properly to washes and other techniques. These cheaper papers tend to break down quickly and don’t age well either, basically yellowing over time. Be sure to read the how to choose the best watercolor paper article when you have time.
If you aren’t aware of the six primary palette, then check out our in-depth article on how to mix watercolors for beginners. It has the exact hues I use for every painting. And, if I make changes, I always update the article so you know the exact hues that get the best results.
Palette: A palette is essential for mixing and diluting your watercolors. Choose a palette with wells to hold different colors and a large mixing area. Small palettes tend to get dirty too quick and I found it difficult to have enough free space to mix enough colors without having to stop everything to clean up. The Masterson Pro palette works great and available at Amazon and Blick Art.
Water Containers: Have at least two containers for water—one for rinsing your brushes and another for clean water. Make sure the containers aren’t too small, and I would recommend plastic over glass. I’ve had plenty of studio accidents and cleaning up shattered glass isn’t ideal when in a creative mode.
Masking Tape and Drawing Board: Masking tape helps secure your paper to a drawing board, keeping it flat and preventing it from warping. The tape is optional and depends if you prefer the clean edges. In the beginning you will most likely focus on sketches and studies, so maybe pass until you determine later on if you need it.
A smooth, firm board is a must! I recommend Gator foam board as it’s very sturdy, smooth and durable. Fairly inexpensive and light weight to boot. That covers materials, let’s move on to skills you need to start watercolor painting.
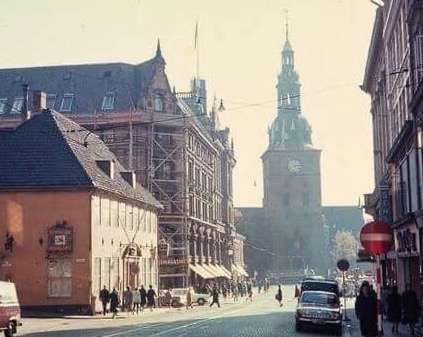
Let’s dive in to the painting techniques that will help you paint amazing urban scenes
- Plan your composition: Start by envisioning the scene you want to paint. Consider the viewpoint, buildings, streets, and any focal points you want to include. Sketch a loose outline on your watercolor paper, keeping it simple and gestural. Explore other artists compositions, too. This is a great way to understand how they compose their artwork.
- Wet the paper: Before applying any paint, wet the entire paper surface using a clean brush and clean water. This step helps create a soft and blended background.
- Apply the initial wash: Mix a light color on your palette, diluting it with water for a transparent effect. Apply this wash over the wet paper, allowing the colors to blend naturally. Start with the sky or background elements and gradually work your way forward, using broad brushstrokes.
- Create the buildings: Once the initial wash has dried, lightly sketch the buildings’ outlines using a pencil. Remember to keep the lines loose and suggestive rather than detailed. Use a mixture of cool and warm colors to depict the variety of materials and surfaces in the cityscape.
- Establish the light and shadow: Observe the light source in your composition and determine the areas of light and shadow. Use a darker shade of the building’s color mixture to paint the shadows, leaving some areas untouched to represent highlights. Keep the brushstrokes loose and suggestive, focusing on the overall impression rather than precise details.
- Add details and textures: As the painting progresses, start adding smaller details like windows, doors, and architectural elements. Use a smaller round brush and a darker color mixture for these finer details. Experiment with dry brush techniques to create interesting textures and patterns.
- Enhance the atmosphere: To capture the cityscape’s atmosphere, introduce additional elements such as trees, streetlights, vehicles, or people. These elements can add a sense of scale and depth to your painting. Again, keep your brushstrokes loose and impressionistic, allowing the viewer’s imagination to fill in the details.
- Finishing touches: Once your painting has dried, step back and assess the overall composition. Make any necessary adjustments or additions to enhance the balance and harmony of the cityscape. You can deepen certain colors, add subtle washes, or create highlights to bring out specific elements. Remember, the goal is to maintain a loose and expressive style, so avoid getting caught up in too many details.
- Sign and protect your artwork: Once you’re satisfied with your watercolor cityscape, sign your name or add your initials in a discreet corner. To protect your artwork, consider spraying it with a fixative or applying a layer of archival varnish, especially if you plan to display or frame it.
Tips and Tricks:
- Experiment with different color palettes to evoke various moods. Warm tones can create a vibrant and energetic cityscape, while cool hues can convey a calm and serene atmosphere.
- Don’t be afraid to let the watercolors blend and bleed on the paper. Embrace the unpredictable nature of the medium, as it often leads to unique and beautiful effects.
- Practice brush control to achieve a loose style. Experiment with different brush sizes, pressure, and angles to create varied brushstrokes and textures.
- Study reference photos or real-life cityscapes to understand the architectural details, light and shadow patterns, and the overall urban atmosphere.
- Be patient and allow layers to dry before adding new ones. This prevents colors from muddying and helps maintain the transparency and freshness of the watercolors.
Conclusion
Painting a loose watercolor cityscape allows you to explore your creativity, capturing the essence and energy of an urban environment. By following this tutorial and embracing the spontaneity of watercolors, you can create stunning cityscape paintings that showcase your unique style.
Remember to practice, experiment, and enjoy the process of bringing a vibrant cityscape to life on your watercolor paper. So, gather your materials, set aside some time, and let your imagination run free as you embark on this artistic journey.
