Expressive Watercolor Seascape Painting Video
Take a journey through an expressive watercolor seascape painting demo, learn the techniques and steps that go into creating a loose seascape.
Watercolor painting is a versatile and captivating medium that allows artists to capture the essence and fluidity of nature’s beauty. Among the various subjects that watercolors excel in portraying, seascapes hold a special place due to their ever-changing colors, textures, and moods.
Get ready to learn some unconventional watercolor seascape painting techniques
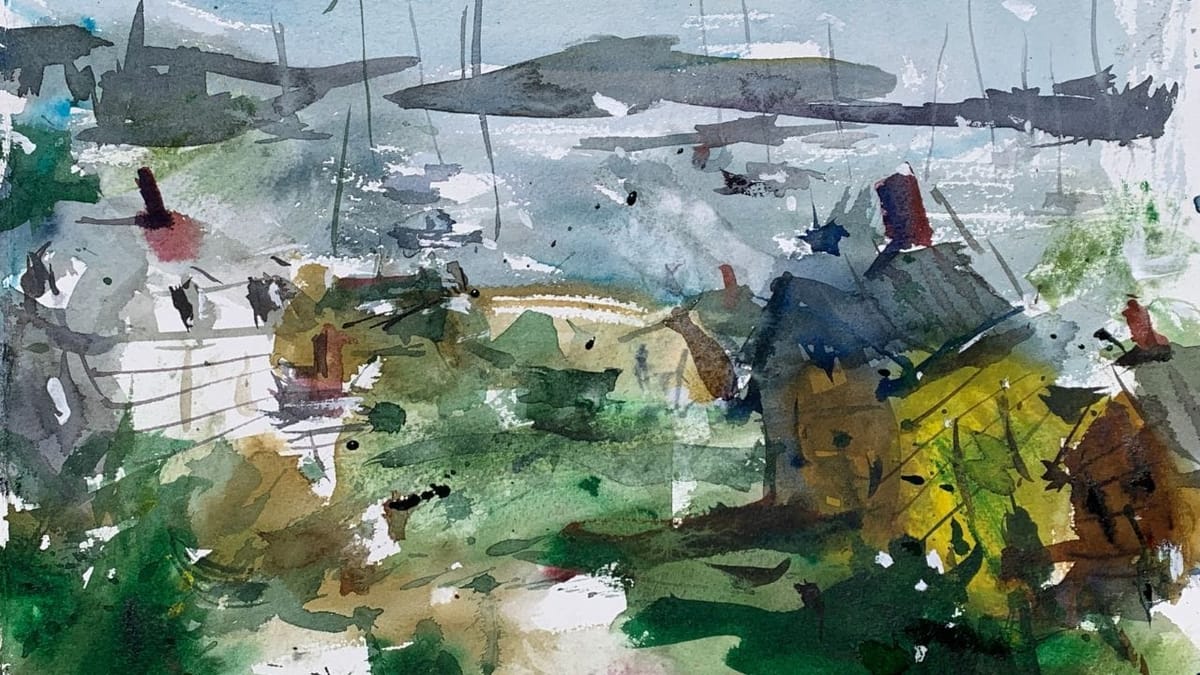
In this blog post, we’ll take you on a journey through an expressive watercolor seascape painting demonstration, unraveling the techniques and steps that go into creating a stunning seascape masterpiece. Below is the full image preview of what I will share in the video below.
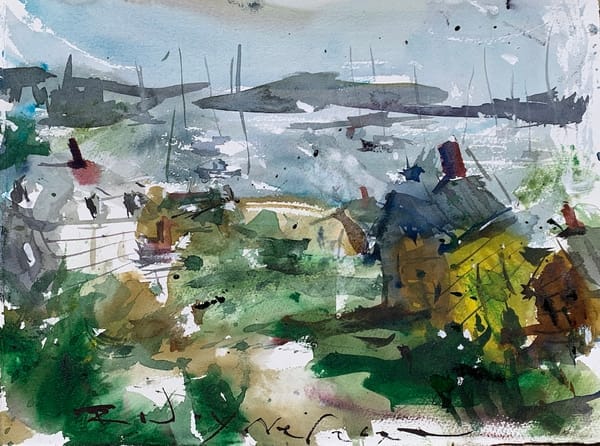
Suggested Material Checklist
Materials can make or break the outcome of a watercolor study. Watch the video that covers the best watercolor materials if you need more specifics about color choices, brush sizes and such. Basically, it’s exactly what I use and recommend for all levels.
Watercolor Paints: Opt for artist-grade watercolor paints in a range of colors. Choose a basic palette that includes six primary colors (one cool and warm hue for each one including red, blue, and yellow) along with earth tones for a versatile collection.
If you aren’t aware of the six primary palette, then check out our in-depth article on how to mix watercolors for beginners. It has the exact hues I use for every painting. And, if I make changes, I always update the article so you know the exact hues that get the best results.
Brushes: Invest in a set of good-quality watercolor brushes with different shapes and sizes. Round brushes are excellent for detailed work, while flat brushes are great for larger washes. I’d recommend one medium and one large pointed round. Then get a large mop brush that will handle those initial washed that are applied in the very beginning.
You only need three brushes to do most of the heavy lifting! However, I do recommend having a dagger and possibly and Motler on hand as well. Check out the article I wrote on how to choose the best watercolor brushes if you have questions on the exact brands, sizes and such.
Paper: I highly recommend selecting watercolor paper specifically designed for this medium. Look for papers labeled “cold-pressed” or “hot-pressed” to suit your preferred texture. Experiment with different weights and brands to find the one that suits your style. Most beginners choose 140 lb. cold press to start their journey. Hot press tends to be a little slick and most used for highly detailed work and portraits.
Avoid cheap, wood pulp papers as they don’t react properly to washes and other techniques. These cheaper papers tend to break down quickly and don’t age well either, basically yellowing over time. Be sure to read the how to choose the best watercolor paper article when you have time.
If you aren’t aware of the six primary palette, then check out our in-depth article on how to mix watercolors for beginners. It has the exact hues I use for every painting. And, if I make changes, I always update the article so you know the exact hues that get the best results.
Palette: A palette is essential for mixing and diluting your watercolors. Choose a palette with wells to hold different colors and a large mixing area. Small palettes tend to get dirty too quick and I found it difficult to have enough free space to mix enough colors without having to stop everything to clean up. The Masterson Pro palette works great and available at Amazon and Blick Art.
Water Containers: Have at least two containers for water—one for rinsing your brushes and another for clean water. Make sure the containers aren’t too small, and I would recommend plastic over glass. I’ve had plenty of studio accidents and cleaning up shattered glass isn’t ideal when in a creative mode.
Masking Tape and Drawing Board: Masking tape helps secure your paper to a drawing board, keeping it flat and preventing it from warping. The tape is optional and depends if you prefer the clean edges. In the beginning you will most likely focus on sketches and studies, so maybe pass until you determine later on if you need it.
A smooth, firm board is a must! I recommend Gator foam board as it’s very sturdy, smooth and durable. Fairly inexpensive and light weight to boot. That covers materials, let’s move on to skills you need to start watercolor painting.
Here’s a great article for learning more about the watercolor materials I use and recommend for all levels.
Take a glimpse at the video demonstration as we delve into a detailed walkthrough.
The process unfolds systematically, commencing right from the outset, enriched with intriguing watercolor techniques that are bound to captivate your interest. When it comes to crafting watercolor landscapes, the essence lies in not only embracing the fundamental principles but also venturing into uncharted territories, paving the way for your unique creative expressions once you’ve established a sense of ease and confidence.
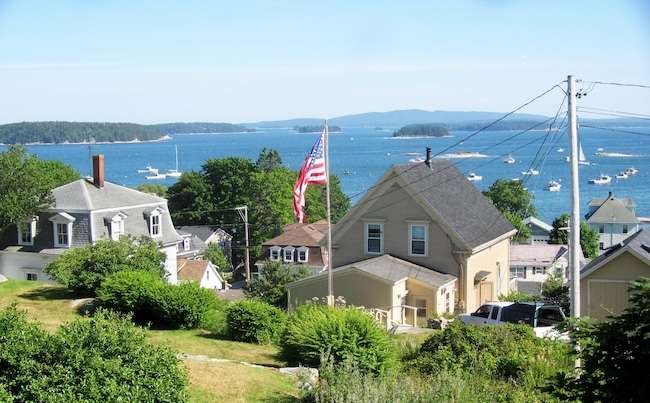
Setting the Scene:
- Choosing a Reference: Begin by selecting a reference photo that resonates with you. This could be an image of a serene beach, a dramatic coastal cliff, or a tranquil sunset over the ocean. Alternatively, you can rely on your imagination to conjure up a unique seascape scene.
- Sketching the Composition: Lightly sketch the basic elements of your seascape onto the watercolor paper using a pencil. This will serve as a guide for your painting. Focus on the horizon line, the land or rocks, the waterline, and any additional elements like boats or birds.
That’s the conventional approach! And if you want to try something new go without a drawing. Trust your instincts and allow for some imperfections to happen.
Unleashing the Colors:
- Wet-on-Wet Technique: To achieve the expressive and fluid quality of watercolors, start by wetting the entire paper with a clean brush or a spray bottle. This will create a wet surface for your paint to move freely.
- Sky and Water Gradients: Using a large round brush, gently apply a wash of the lightest color you plan to use for the sky, such as a pale blue or pink. While the paper is still wet, introduce a slightly deeper hue at the top, gradually transitioning into a darker shade as you move downward. This creates the illusion of a sky that’s fading into the distance.
- Foreground Elements: Continue by adding the base colors of the land or rocks in the foreground. Allow these colors to bleed into the wet paper, creating soft edges that mimic the blending of earth and sea.
Capturing the Essence:
- Waves and Movement: Use a smaller round brush to paint the water, applying horizontal strokes to capture the rhythm of waves. Incorporate various shades of blue and green, allowing the colors to mix naturally on the wet surface.
- Foam and Spray: To convey the crashing waves, use a dry brush technique to gently flick white paint across the paper. This creates the illusion of foam and spray, adding movement and energy to the scene.
- Textures and Details: As the layers begin to dry, enhance the textures of the rocks and land by adding subtle details with darker tones. Use the edge of your brush to suggest the texture of rocks or the outlines of cliffs.
Looking for more watercolor painting ideas?
Final Touches:
- Refining the Horizon: Strengthen the horizon line between the sky and the sea, making sure it’s well-defined but not too sharp. This adds depth to your painting.
- Adding Accents: Once the painting is mostly dry, use a smaller brush to add finer details such as distant sailboats, birds in the sky, or small reflections on the water’s surface.
- Signature and Sealing: After the painting is completely dry, consider signing your masterpiece and protecting it with a watercolor fixative or varnish to prevent smudging.
Conclusion:
Creating an expressive watercolor seascape painting is a fulfilling journey that requires a balance of technique, creativity, and spontaneity. Through careful observation of colors, textures, and movements, you can translate the beauty of the ocean onto your paper with the fluidity and charm that watercolors uniquely offer.
Remember, each brushstroke is a chance to capture the ever-changing dance of light and water, making your seascape a truly one-of-a-kind masterpiece. So, gather your materials, let your imagination flow, and embark on the wonderful adventure of watercolor seascape painting.
