How to Mix Watercolors Guide
Master the art of mixing watercolors with our ultimate guide. Loaded with expert tips, step-by-step video tutorial, and demonstrations.
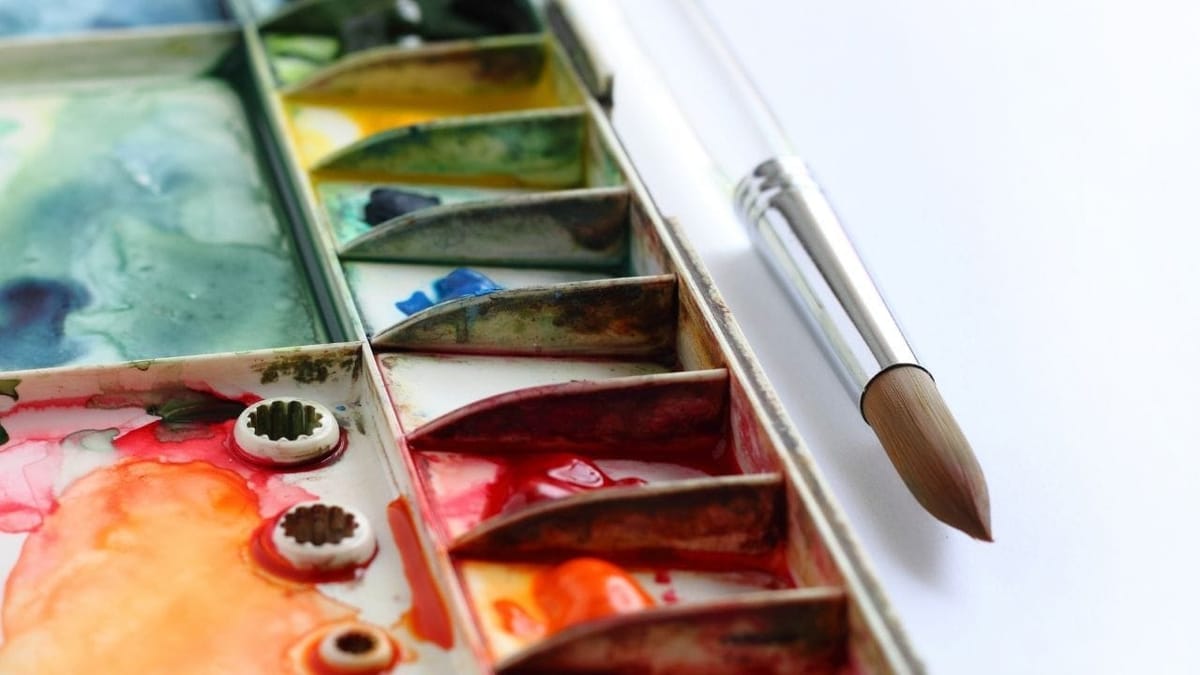
There are many watercolor skills beginners need to know, learn and execute in order to paint successfully. And none are more important than color mixing. In this beginner watercolor mixing guide I will share some great tips that will help you mix any hue you need. Spoiler alert! What we learned as kids doesn’t ring true! You need six primary hues to mix secondary colors well, and this is where we will begin our journey.
Joining Fanatic Plus helps support the site and gives you full access to every premium course and in-depth tutorial.
👉 Join Fanatic Plus
Tips and tricks for learning how to mix watercolors
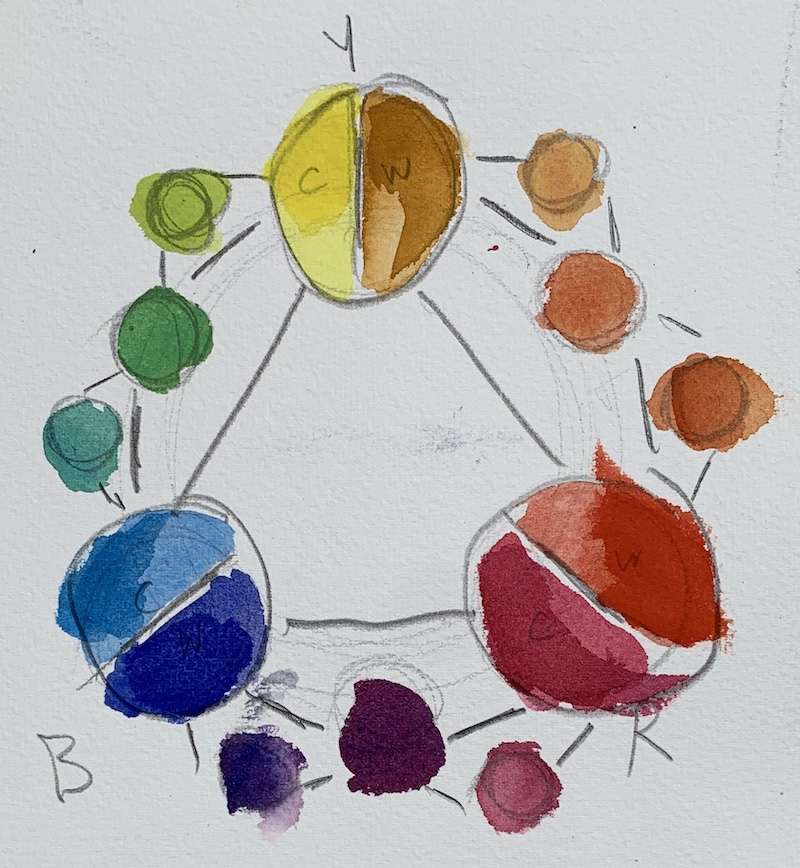
While it may seem daunting at first, with some basic knowledge and practice, anyone can become adept at watercolor mixing. Rolling your sleeves up is key. Don’t just read and leave, create color charts as I did in the examples below.
Understanding Basic Color Theory
Before diving into the art of watercolor mixing, it’s essential to grasp the basics of color theory. Colors are typically categorized into primary, secondary, and tertiary colors.
- Primary colors, including red, blue, and yellow, are the foundation of all other colors.
- Secondary colors, such as purple, green, and orange, are formed by mixing primary colors.
- Tertiary colors are achieved by mixing primary and secondary colors.
Understanding this color wheel and how colors relate to one another is crucial for successful color mixing.
What We Learned in Grade School Doesn’t Work!
As a beginner, it’s best to start with a limited palette of colors. Too many and it gets confusing! The six primary hues you need are one warm and one cool for each primary. This alone can send beginners in a tailspin! But hear me out, every hue has a bias to it.
For example, Ultramarine blue is a warm blue because it has red in it. So, what’s the big deal? Well, if you try to mix green using ultramarine blue you are guaranteed to have a graying green color. In order to mix a proper green, it takes a cool blue such as Cobalt blue. Again, that’s just one example but hopefully you get the point.
These Are The 6 Hues Needed To Mix Proper Secondary and Tertiary Hues
Here’s the deal. A 6-primary palette is highly recommended by most professionals. This approach allows for greater color versatility and subtlety in your artwork. Here’s an example of warm and cool hues;
- Warm Reds: Cadmium Red Light, and Scarlet
- Cool Reds: Alizarin Crimson or Permanent Rose
- Warm Blues: Ultramarine Blue or Cobalt Blue
- Cool Blues: Cerulean Blue or Phthalo Blue
- Warm Yellows: Cadmium Yellow, Yellow Ochre or Indian Yellow
- Cool Yellows: Lemon Yellow or Hansa Yellow
That being said, you only need one warn and one cool for each primary color. Here is my exact palette, but know there are some other selections that would do the job just fine.
- Reds: Alizarin crimson and Cadmium red light
- Blues: Ultramarine blue deep and Cobalt blue
- Yellows: Cadmium yellow lemon and Yellow ochre
- Neutrals: Burnt Sienna, neutral tint and Lavender
- Titanium white matte (for highlights)
With these six colors, you can mix a wide range of hues, tints, and shades. Let’s explore some color mixing possibilities:
- To create oranges: Mix warm red with warm yellow. Adjust the ratio to achieve a range of oranges, from vibrant to muted.
- To create purples: Mix warm red with cool blue. Experiment with different proportions to achieve a variety of purple shades, from deep violets to lighter lavenders.
- To create greens: Mix warm yellow with cool blue. Vary the ratio to create a spectrum of greens, from lush emerald to delicate mint.
- To create secondary and tertiary colors: Combine the primary colors with their complementary colors. For example, mix warm red with cool green to create a neutral gray. Mix warm blue with warm orange to achieve a muted brown.
- To create lighter shades: Add small amounts of warm or cool white to your color mixtures. This will lighten the value while maintaining the hue.
Remember, these are just starting points, and you should experiment with different ratios and combinations to discover the colors that resonate with your artistic vision.
Mixing Techniques
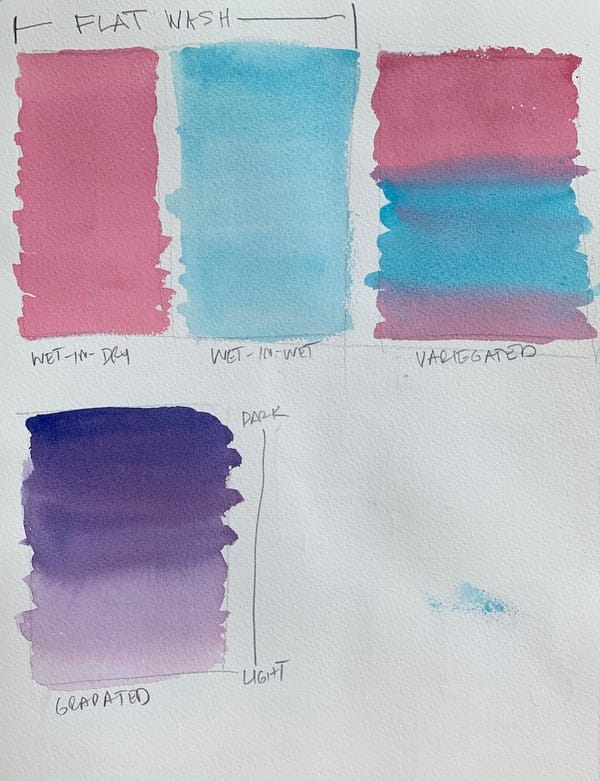
There are various watercolor mixing techniques that you can employ to achieve different effects. Some of the most commonly used techniques include:
- Wet-on-Wet: Wetting the paper first and then applying wet paint on top creates a soft and diffused effect. Colors blend effortlessly in this technique, allowing for smooth transitions and gradients.
- Wet-on-Dry: Applying wet paint onto dry paper results in more defined and crisp edges. This technique is suitable for creating sharp details and layering colors.
- Glazing: Glazing involves layering translucent washes of color on top of each other. By allowing each layer to dry before applying the next, you can achieve depth, luminosity, and richer tones.
- Gradated Wash: Gradated washes involve blending colors from dark to light or vice versa, creating a smooth transition. This technique is particularly useful for creating backgrounds or creating atmospheric effects.
- Dry Brush: Using a dry brush with minimal water and more concentrated pigment creates a textured effect. This technique is great for adding texture to surfaces like rocks, tree barks, or fur.
Color Mixing Tips
To achieve the desired colors while mixing watercolors, keep the following tips in mind:
- Start with a clean palette and use separate wells or mixing areas for each color. This avoids contamination and muddying of colors.
- Use a limited amount of water when mixing colors to prevent your paint from becoming too diluted. You can always add more water as needed.
- Begin with lighter colors and gradually add darker colors to avoid overpowering the mixture. Remember that it’s easier to darken a color than to lighten it.
- Experiment and make a color chart or swatch book to record your color mixing experiments. This will serve as a useful reference for future projects.
- Take note of complementary colors (colors opposite each other on the color wheel), as they can be mixed to create vibrant neutrals or interesting color harmonies.
Additional Tips for Color Mixing
Here are a few additional tips to enhance your color mixing skills:
- Keep a clean water container and rinse your brush thoroughly when switching between colors. This prevents unwanted color contamination.
- Start with small amounts of paint when mixing. You can always add more if needed. This helps maintain control over the intensity and value of the resulting mixture.
- Allow your mixed colors to sit for a few minutes before evaluating the final result. Watercolors tend to dry lighter than they appear when wet, so it’s crucial to consider this during the mixing process.
- Take note of the transparency and staining properties of your pigments. Some colors may be more transparent or prone to staining than others, which can affect how they mix with other colors.
- Explore the vast array of watercolor resources available, such as books, online tutorials, and workshops. Learning from experienced artists and observing their color mixing techniques can inspire new ideas and approaches.
Conclusion
Mastering watercolor mixing is an exciting journey that combines knowledge, practice, and experimentation. By understanding color theory, choosing a suitable palette, and employing various mixing techniques, beginners can unlock a world of possibilities.
Remember to be patient, keep practicing, and allow yourself the freedom to explore and discover unique color combinations. With time and dedication, you’ll develop your own intuitive sense of color mixing and create stunning watercolor artworks that reflect your artistic vision.
