20 Beginner Watercolor Painting Techniques
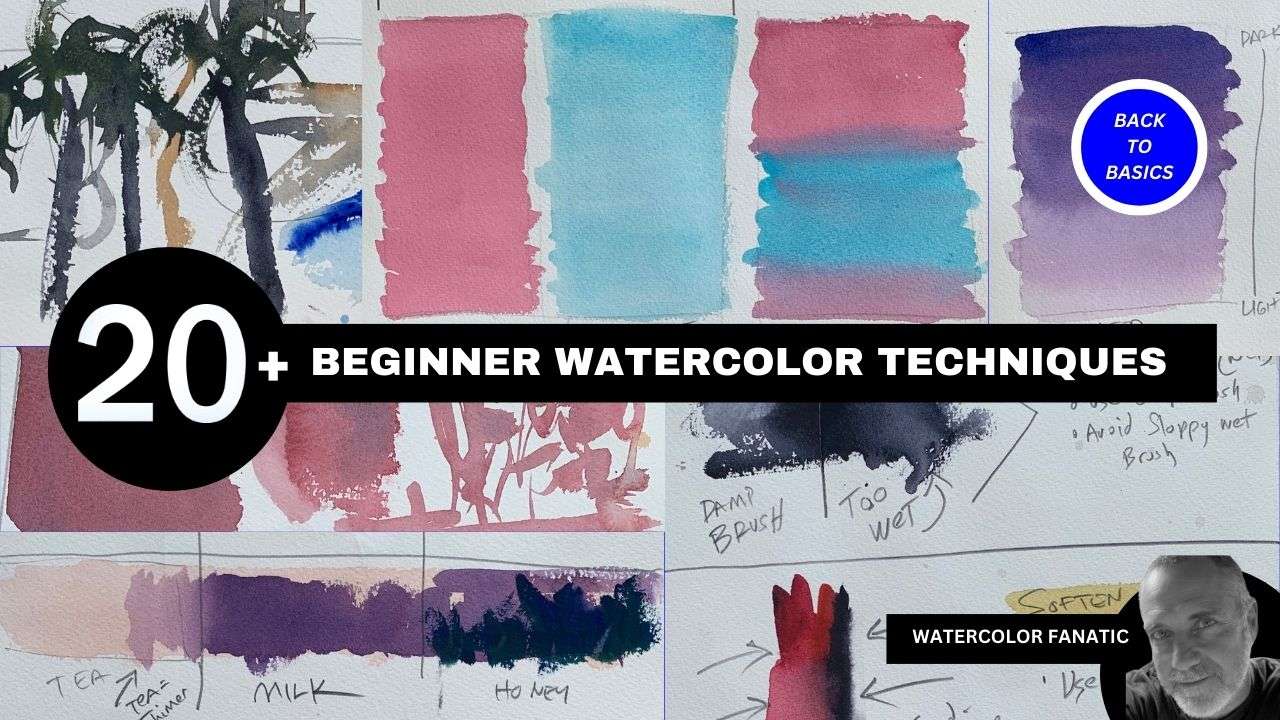
In this guide, we’ll explore 20 beginner watercolor painting techniques that will empower your artistic potential and create stunning artwork.
Introduction to 20 Beginner Watercolor Techniques
Getting started on a journey into watercolor painting is an exciting and challenging endeavor. Whether you’re a novice artist or an experienced painter looking to refresh your skills, mastering the basics of watercolor techniques is essential. In this comprehensive guide, we’ll explore 20 beginner-friendly watercolor techniques that will empower you to unleash your artistic potential and create stunning works of art.
From mastering washes and blending colors to experimenting with wet-on-wet and dry brush techniques, this introduction will provide you with the foundational knowledge and practical skills needed to embark on your watercolor journey with confidence and enthusiasm.
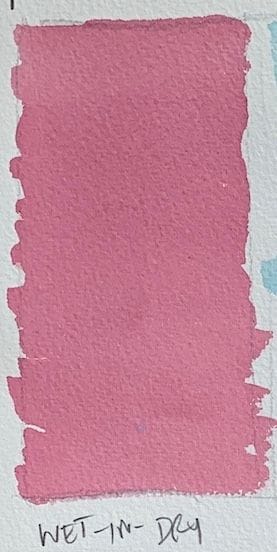
Wet-in-Dry Wash Technique
The Wet-in-Dry wash technique is a watercolor painting method where wet paint is applied to a dry area of the paper. This technique allows for greater control and precision, as the dry paper absorbs the wet paint in a more controlled manner, resulting in sharper edges and defined shapes. By using this technique, artists can create intricate details and layers in their watercolor paintings, adding depth and dimension to their artwork. It’s like carefully planting seeds in a well-prepared garden soil, allowing them to grow and flourish in a controlled environment, yielding beautiful and deliberate results in the painting.
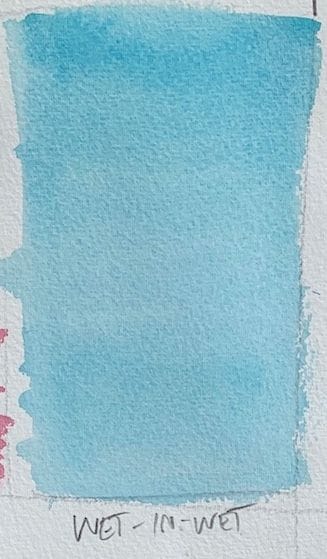
Wet-in-Wet Flat Wash
A wet-in-wet flat watercolor wash is a painting technique where wet paint is applied to wet paper, resulting in soft, flowing, and complex effects. It involves wetting the paper with clean water, then applying the color, allowing it to bloom and spread. The paint is encouraged to flow and blend by adding more colors and using a brush to pull and push them around. This technique allows for creating unique and unexpected patterns with watercolors, adding dimension and interest to the final work.
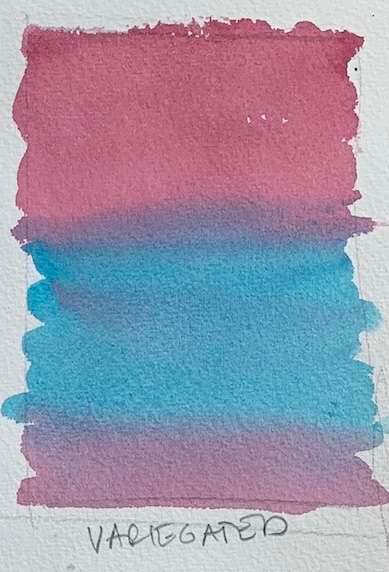
Variegated Wash
A variegated wash is a versatile watercolor technique that involves blending two or more colors to create a transition of color or tone across the surface. It’s similar to the graded wash technique, but with the addition of multiple colors. This technique is particularly effective for suggesting landscapes and backgrounds in paintings.
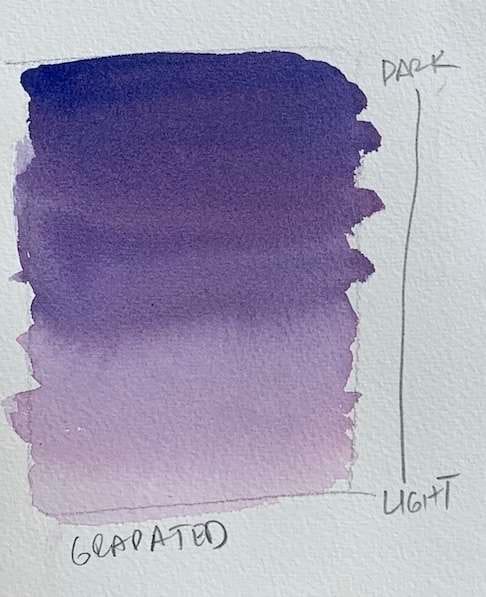
Gradated Wash
A gradated watercolor wash is a technique used in watercolor painting where the color transitions gradually from dark to light or from one color to another. This technique is achieved by applying a wash of watercolor paint to wet paper, allowing the paint to flow and blend naturally. By controlling the amount of water and pigment, artists can create smooth transitions and gradients of color, adding depth and dimension to their paintings. Gradated washes are commonly used for creating backgrounds, atmospheric effects, and adding subtle shading to artwork.
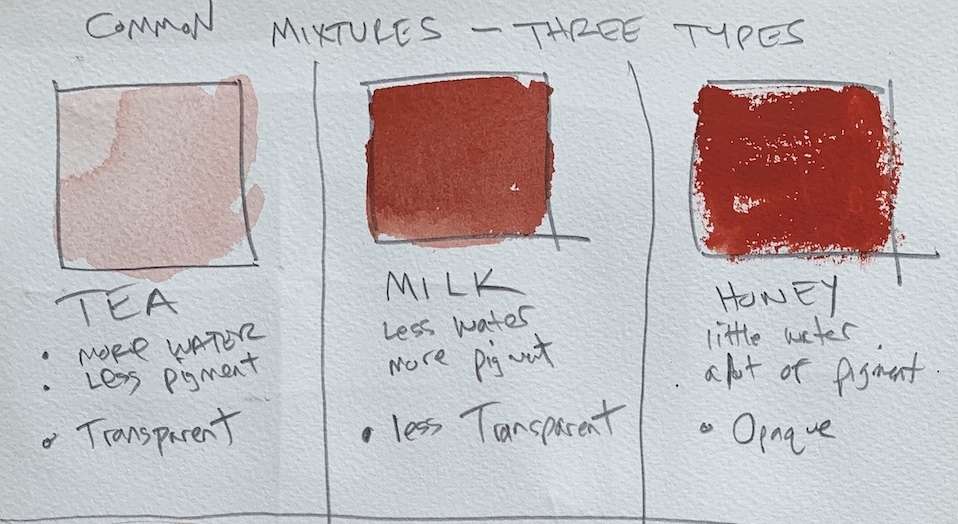
Three common watercolor mixtures
The three common watercolor mixtures are tea, milk and honey. Here’s a breakdown of what each one is and how they are unique.
- Tea Mixture: To create a tea-like watercolor mixture, you’ll want to aim for a warm, earthy tone. Start with a base color such as raw sienna or burnt sienna. These colors mimic the rich hues found in brewed tea. Dilute the base color with water to achieve the desired transparency and adjust the warmth by adding a touch of yellow ochre or light red. Depending on the strength of the tea you’re trying to replicate, you might need to experiment with the ratio of pigment to water to achieve the right intensity.
- Milk Mixture: Milk typically imparts a creamy, slightly off-white color. Begin with a base of titanium white or Chinese white pigment, which will provide the milky opacity. Dilute the white pigment with a large amount of water to create a translucent effect, resembling the consistency of milk. If you want to add a hint of warmth, you can mix in a tiny amount of yellow ochre or raw sienna. Be sure to test the opacity and adjust the ratio of pigment to water as needed to achieve the desired milk-like appearance.
- Honey Mixture: Honey has a golden-yellow hue with a translucent quality. Start with a base of yellow ochre or raw sienna, which will provide the foundation for the honey’s color. Gradually add touches of burnt sienna or burnt umber to deepen the tone and create the rich amber color of honey. To enhance the translucency, dilute the mixture with water until it reaches the desired consistency. You can also experiment with adding a small amount of transparent yellow or golden yellow to capture the warm glow of honey.
Remember, watercolor painting is all about experimentation and finding the right balance between pigment intensity and water dilution to achieve the desired effects. Feel free to adjust these mixtures based on your preferences and the specific qualities you want to capture in your artwork.
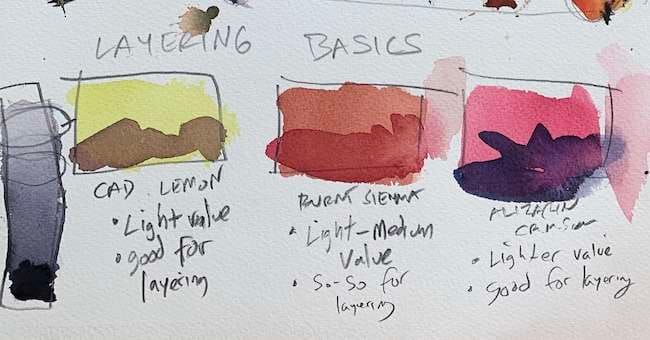
Layering thin to thick
Layering thin to thick is a fundamental technique in watercolor painting that involves gradually building up the intensity and depth of colors by applying multiple translucent layers of paint. Here’s a step-by-step description of how to layer thin to thick in watercolor:
- Start with a light sketch: Begin by lightly sketching the basic outlines and shapes of your subject using a pencil. Keep the lines light so they won’t show through the layers of paint.
- Mix your first wash: Prepare a light wash of your desired color by diluting watercolor pigment with water on your palette. The wash should be quite watery to create a transparent layer.
- Apply the first wash: Using a clean brush, apply the thin wash of paint over the areas of your painting where you want this color to appear. Be sure to work quickly and evenly to avoid streaks or hard edges.
- Allow the first layer to dry: Let the first layer of paint dry completely before proceeding to the next step. This ensures that subsequent layers won’t blend with the previous ones and helps prevent unwanted mixing of colors.
- Mix your subsequent layers: As you move on to subsequent layers, gradually increase the concentration of pigment in your paint mixture to create thicker, more opaque colors. You can also adjust the color by adding different pigments or mixing complementary colors to create shadows and highlights.
- Apply the subsequent layers: Using the same process as before, apply the thicker layers of paint over the areas where you want to build up color and detail. Use smaller brushes for more intricate areas and larger brushes for broader areas.
- Add details and final touches: Once you’ve built up the desired intensity and depth with multiple layers, you can add finer details and highlights using a smaller brush and thicker paint. Take your time to add any final touches and refine your painting until you’re satisfied with the result.
By layering thin to thick, you can achieve rich, luminous effects in your watercolor paintings while maintaining the transparency and luminosity that are characteristic of this medium. Experiment with different colors, layering techniques, and brushstrokes to create depth, texture, and dimension in your artwork.
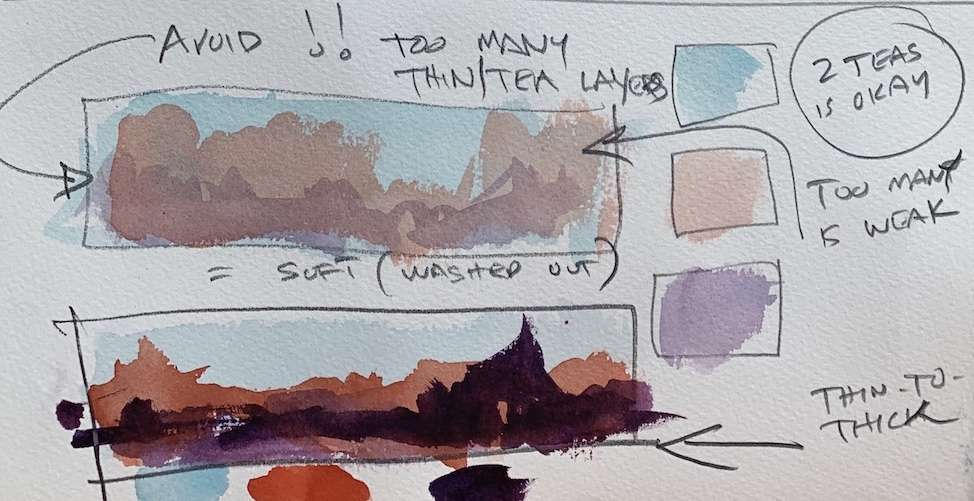
Avoid too many thin layers
Using too many thin or weak layers in watercolor painting can lead to several challenges and undesirable outcomes:
- Muddiness: Each layer of watercolor paint reactivates the layers underneath it. If you apply too many thin layers without allowing them to dry completely between applications, the colors can become muddy and mixed together, resulting in a loss of clarity and vibrancy.
- Overworking the paper: Excessive layering can cause the paper to become oversaturated and prone to buckling or warping. This can make it difficult to achieve smooth washes and crisp details, as the paper may not be able to absorb additional layers of paint evenly.
- Loss of luminosity: Watercolor is known for its luminous quality, which comes from the transparency of the paint and the reflection of light off the white paper beneath. Too many thin layers can diminish this luminosity by building up opacity and blocking light from penetrating through the layers.
- Difficulty in correcting mistakes: If you make a mistake or want to make changes to your painting, multiple thin layers can make it challenging to lift or adjust the paint without damaging the paper or causing streaking. This can limit your ability to refine your artwork and achieve the desired results.
- Wasting time and materials: Applying numerous thin layers can be time-consuming and may require more paint and paper than necessary. It’s more efficient to apply fewer, more deliberate layers while focusing on achieving the desired effects with each application.
Instead of relying on too many thin layers, it’s often more effective to plan your painting carefully, mixing your colors appropriately, and applying each layer with intention and confidence. Allow each layer to dry completely before adding additional layers to maintain clarity and prevent muddiness. Experiment with different layering techniques and thicknesses to achieve the desired effects while preserving the luminosity and transparency that make watercolor painting unique.
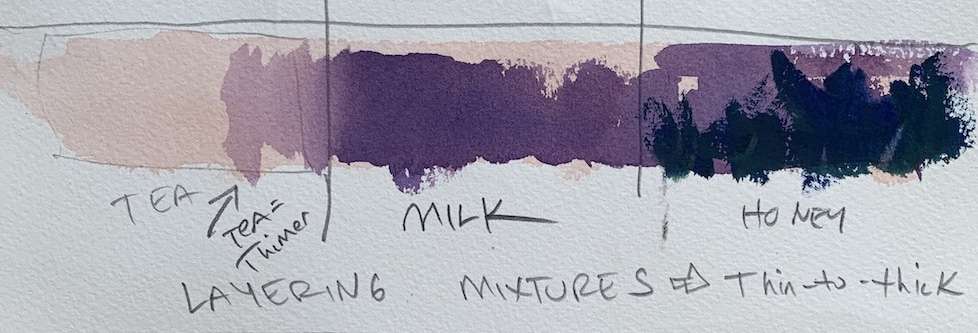
Light to dark
Painting light to dark in watercolor offers several benefits that contribute to the overall quality and success of your artwork:
- Preservation of luminosity: Watercolor is renowned for its luminous quality, which comes from the transparency of the paint and the reflection of light off the white paper beneath. By painting light colors first, you maintain this luminosity as light can still penetrate through the transparent layers of paint, giving your artwork a vibrant and glowing appearance.
- Ease of correction: When you start with lighter colors and gradually build up to darker tones, it’s easier to correct mistakes or make adjustments as you progress. Light colors are more forgiving and can be painted over or lifted more easily than dark colors, allowing you to refine your composition and achieve the desired effects without compromising the integrity of the paper.
- Control over tonal values: Painting light to dark enables you to establish a strong foundation of tonal values in your artwork. By gradually increasing the intensity of your colors, you can create a sense of depth, dimension, and contrast, leading to a more visually dynamic and engaging composition.
- Enhanced transparency and layering: Watercolor is a transparent medium, meaning that each layer of paint allows the layers beneath it to show through to some extent. By starting with light washes and gradually building up to darker tones, you can take full advantage of this transparency, allowing the colors to blend and interact in subtle and beautiful ways.
- Reduced risk of muddiness: Painting light to dark helps to prevent colors from becoming muddy or overworked. By building up the layers gradually and allowing each layer to dry completely before adding the next, you can maintain clarity and vibrancy in your colors, avoiding the risk of unintentional mixing or blending.
Overall, painting light to dark in watercolor allows you to achieve greater control, depth, and luminosity in your artwork, resulting in more visually compelling and professional-looking paintings. It’s a foundational technique that can greatly enhance your ability to create beautiful and expressive watercolor compositions.
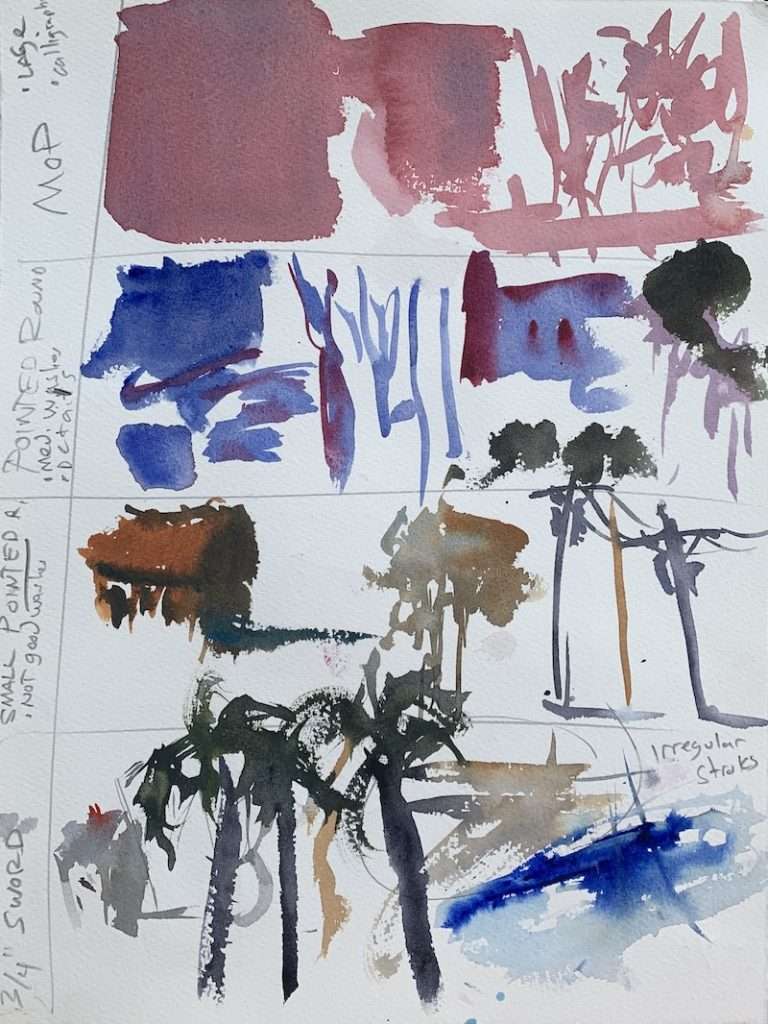
Brushwork techniques
Exploring brushwork techniques in watercolor painting offers a multitude of benefits, enriching both the process and the final outcome of your artwork:
- Expressiveness: Different brushwork techniques allow you to convey various emotions, moods, and textures in your paintings. Whether it’s soft and delicate washes for a tranquil landscape or bold and energetic strokes for a dynamic seascape, mastering brushwork techniques enables you to express yourself more freely and effectively as an artist.
- Versatility: By experimenting with a range of brush sizes, shapes, and strokes, you can achieve a wide variety of effects in your watercolor paintings. From fine details and intricate patterns to broad washes and sweeping gestures, brushwork techniques offer endless possibilities for creative expression and exploration.
- Depth and dimension: Strategic use of brushwork techniques can enhance the sense of depth and dimension in your artwork. By varying the pressure, angle, and direction of your brushstrokes, you can create the illusion of three-dimensional forms, adding visual interest and realism to your paintings.
- Texture and visual interest: Brushwork techniques allow you to create a rich variety of textures and surface effects in your paintings. Whether it’s the rough texture of tree bark, the softness of flower petals, or the shimmering surface of water, mastering brushwork enables you to capture the intricate details and nuances of your subject matter, adding depth and visual interest to your artwork.
- Personal style development: Developing proficiency in brushwork techniques empowers you to develop your own unique artistic style. As you experiment with different approaches and discover what resonates most with you, you’ll gradually develop a signature way of painting that sets your work apart and reflects your individual voice as an artist.
- Continuous learning and growth: Brushwork techniques are endlessly fascinating and offer a lifetime of learning and exploration. No matter how experienced you become, there’s always something new to discover and master, keeping the creative process fresh, exciting, and rewarding.
In summary, exploring brushwork techniques in watercolor painting not only enhances the visual impact of your artwork but also deepens your understanding of the medium and fosters personal growth and artistic development. It’s a journey of discovery and self-expression that enriches both the artist and the audience alike.
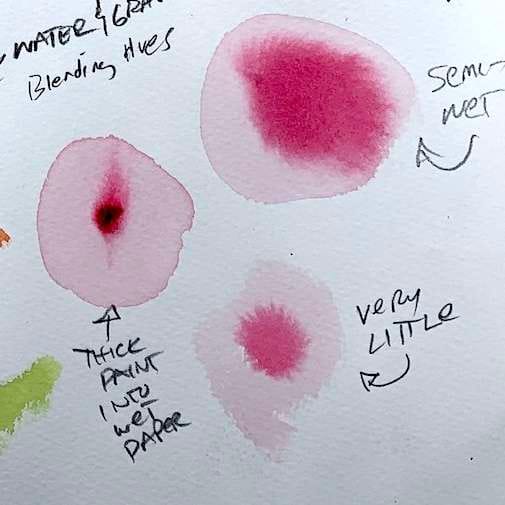
How water impacts washes & timing
Timing is crucial in watercolor painting, especially when working into a wet wash, as it significantly affects the outcome of your artwork. Here’s why timing is important in this context:
- Blendability: When you work into a wet wash, the paint remains fluid and malleable for a short period. This allows you to blend colors seamlessly and create smooth transitions between different hues. However, this window of opportunity is limited, and if you wait too long, the paint will begin to dry, making it challenging to achieve the desired blending effects.
- Soft edges: Painting into a wet wash enables you to create soft, diffused edges, which can be particularly useful for depicting atmospheric effects, reflections, and subtle transitions in your artwork. Timing is critical here because the longer you wait, the more defined and hard-edged your brushstrokes will become as the paint starts to dry.
- Control over textures: By working into a wet wash at different stages of drying, you can create a variety of textures and surface effects in your paintings. For example, painting into a wash that is still very wet will produce soft, diffused textures, while painting into a wash that is starting to dry will result in more pronounced brushstrokes and textures.
- Layering and glazing: Timing also affects your ability to layer colors and apply glazes in watercolor painting. By waiting for the initial wash to dry partially or completely before adding subsequent layers, you can build up depth and complexity in your artwork, creating rich, luminous effects that are characteristic of watercolor painting.
- Avoiding blooms and backruns: Working into a wet wash requires careful attention to timing to avoid unintended effects such as blooms (caused by uneven drying of the paint) and backruns (caused by excess water pooling in certain areas). By monitoring the drying process and adjusting your painting technique accordingly, you can minimize the risk of these issues and maintain control over your artwork.
Overall, timing plays a crucial role in watercolor painting when working into a wet wash, affecting everything from blendability and edge quality to texture, layering, and the prevention of unwanted effects. Developing a keen sense of timing and learning to work quickly and decisively will help you achieve the desired results and create beautiful, expressive watercolor paintings.
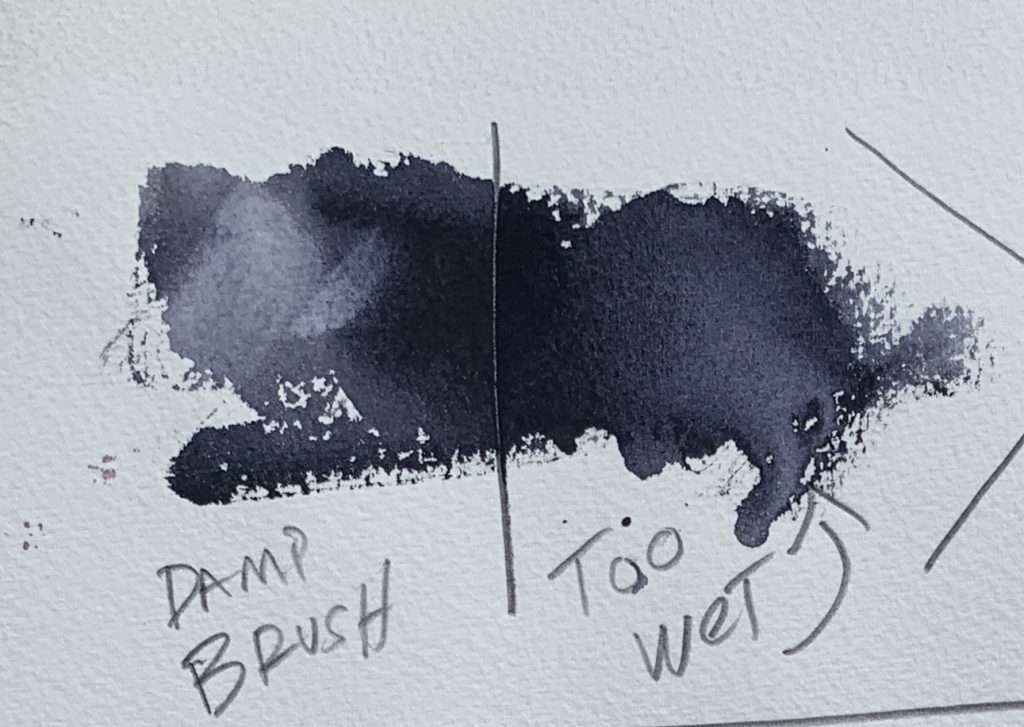
Lifting paint
Lifting or removing watercolor paint is a common technique used in watercolor painting to correct mistakes, adjust values, create highlights, or add texture. Here’s how to lift or remove watercolor paint effectively:
- Use a clean, damp brush or sponge: Wet the bristles of a clean brush or a sponge with water. Make sure the brush or sponge is not dripping wet but moist enough to soften the paint on the paper.
- Blot or lift the paint gently: Carefully blot or lift the paint from the paper using the damp brush or sponge. Use a dabbing or lifting motion rather than rubbing, as rubbing can damage the paper surface and spread the paint further.
- Repeat as needed: If the paint does not lift completely on the first attempt, repeat the process with a clean area of the brush or sponge. Be patient and gentle to avoid damaging the paper or causing pilling.
- Use a paper towel or tissue: In addition to using a brush or sponge, you can also lift paint by blotting it with a clean paper towel or tissue. Press the paper towel or tissue lightly onto the painted area and lift it away to remove excess moisture and paint.
- Scrape with a palette knife or edge of a credit card (if necessary): For stubborn or dried paint, you can gently scrape the surface of the paper with the edge of a palette knife or a credit card. Be very careful not to tear or damage the paper, and avoid scraping too aggressively.
- Allow the paper to dry completely: Once you’ve lifted or removed the paint to your satisfaction, allow the paper to dry completely before proceeding with additional layers or adjustments. This will prevent unwanted blending or reactivation of the paint.
- Repeat if necessary: Depending on the desired effect and the amount of paint you need to lift, you may need to repeat the lifting process multiple times to achieve the desired result. Take your time and work gradually to avoid overworking the paper.
It’s important to note that while lifting can be an effective technique for correcting mistakes or making adjustments in watercolor painting, it may not always completely remove the paint or restore the paper to its original condition. Additionally, repeated lifting can weaken the paper surface, so it’s best to use this technique sparingly and with caution.
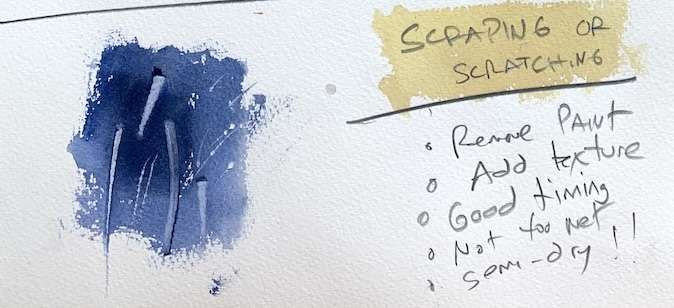
Scratching into paint
Scratching into paint, also known as sgraffito, is a technique used in various painting mediums, including watercolor, acrylics, and oils. It involves selectively removing or scratching away areas of paint to reveal the underlying layers or the white surface of the canvas or paper. Here’s how to use this technique effectively in watercolor painting:
- Preparation: Begin by applying a base layer of watercolor paint to your paper. This base layer can be a wash of color or a combination of colors, depending on your desired effect. Make sure the paint is completely dry before proceeding to the next step.
- Choose your tools: Select a tool for scratching into the paint. Common tools used for this purpose include wooden skewers, palette knives, toothpicks, stiff brushes, or even your fingernails. Choose a tool that will allow you to achieve the desired level of detail and texture in your artwork.
- Plan your design: Before you start scratching into the paint, take some time to plan your design or composition. Visualize where you want to reveal the underlying layers of paint and consider how the scratched areas will interact with the rest of your painting.
- Scratch away the paint: Using your chosen tool, gently scratch into the dry paint to reveal the layers beneath. You can create lines, shapes, textures, or patterns, depending on your artistic vision. Experiment with different pressures and angles to achieve the desired effects.
- Control the depth: Pay attention to the depth of your scratches. Light scratching will remove only a small amount of paint, while deeper scratching will reveal more of the underlying layers. By varying the pressure and technique, you can create a range of textures and visual effects in your painting.
- Blend and refine: After scratching into the paint, you may choose to blend or soften the scratched areas to integrate them more seamlessly with the rest of your painting. You can do this by lightly brushing over the scratched areas with a damp brush or by adding additional layers of paint to adjust the colors and values as needed.
- Experiment and practice: Scratching into paint is a versatile technique that offers endless creative possibilities. Take the time to experiment with different tools, surfaces, and painting techniques to discover new ways of incorporating sgraffito into your watercolor paintings. As with any technique, practice is key to mastering the art of scratching into paint and achieving the desired results in your artwork.
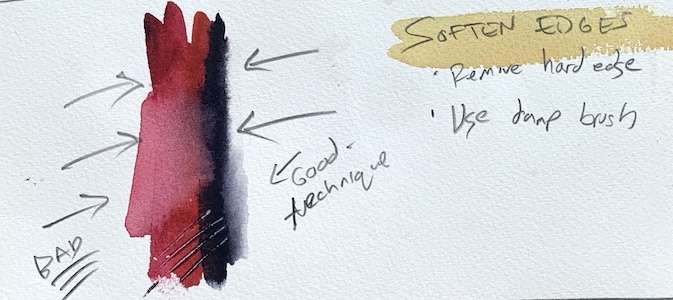
Softening edges
Softening hard edges in watercolor painting can help create smoother transitions between shapes and colors, adding depth and realism to your artwork. Here are several techniques you can use to soften hard edges effectively:
- Wet-on-wet technique: Wet the area of the paper where you want to soften the edge with clean water using a brush. Then, apply the paint directly onto the wet surface, allowing the colors to blend and diffuse naturally. This technique is particularly useful for creating soft, atmospheric effects and seamless transitions between colors.
- Dry brush blending: After applying paint to the paper, use a clean, damp brush to gently feather or blend the edges of the paint while it is still wet. This can help soften hard edges and create a more gradual transition between colors. Be careful not to overwork the area, as this can cause the colors to muddy or lose their vibrancy.
- Lifting with a clean brush or sponge: If you’ve already painted a hard edge and want to soften it, you can lift some of the pigment with a clean, damp brush or sponge. Wet the brush or sponge and gently dab or blot the edge of the paint to remove excess pigment and soften the transition. Repeat this process as needed until you achieve the desired effect.
Experiment with these techniques to find the ones that work best for your painting style and desired effects. With practice and experimentation, you’ll become more adept at softening hard edges and creating beautiful, seamless transitions in your watercolor paintings.
Conclusion
There exist numerous watercolor techniques to delve into, yet grasping these fundamental ones is essential for mastering watercolors. Invest time in practicing these techniques now, as they lay a solid foundation that will yield significant benefits in the future.
